ThinkSparksX – Documentation
Self‑hosted AI‑powered SaaS for ideas, nutrition insights, and subscriptions. This guide explains setup, configuration, and each module with screenshot placeholders.
Introduction
ThinkSparksX helps users generate personalized recipes, gifts, and activities, analyze food images for nutrition, track intake, and monetize with Stripe subscriptions. It's SaaS‑ready: deploy once, sell plans to your users.

⚡ Quick Start Guide
Get ThinkSparksX running in under 15 minutes with this streamlined setup process.
🚀 For Beginners (Shared Hosting)
- Upload files to your hosting via cPanel
- Create database using MySQL Databases tool
- Visit your domain and follow the installer
- Configure Stripe for payments
- Add AI API keys for content generation
Perfect for shared hosting users with cPanel access
💻 For Developers (VPS/SSH)
- Upload via SSH or Git clone
- Run composer install for dependencies
- Configure .env with your settings
- Run migrations to set up database
- Build assets with npm run build
Ideal for developers with server access
Server Requirements
If you're not sure about how to configure these settings, please contact your hosting provider. Most modern hosting providers meet these requirements by default.
PHP Requirements
- PHP Version: 8.2 or greater (8.3+ recommended)
- Required Extensions: Ctype, cURL, DOM, Fileinfo, Filter, Hash, Mbstring, OpenSSL, PCRE, PDO, Session, Tokenizer, XML, JSON, ZIP, BCMath
- Web Server: Nginx (recommended) or Apache with mod_rewrite enabled
- Database: MySQL 8.0+ or PostgreSQL 14+
- Composer: Latest version for dependency management
- Node.js: 18+ (only if building assets locally)
PHP Configuration Limits
These are the recommended PHP settings for optimal performance. Contact your hosting provider if you need help adjusting these values.
• max_execution_time: 300 seconds
• max_input_time: 300 seconds
• memory_limit: 1024M or higher
• post_max_size: 1024M or higher
• upload_max_filesize: 1024M or higher
• max_input_vars: 2000+
• file_uploads: On
• allow_url_fopen: On
• curl: Enabled
Server Recommendations
Shared Hosting
- PHP 8.2+ support
- MySQL 8.0+ database
- cPanel or similar control panel
- Cron job access
- SSL certificate support
VPS/Dedicated Server
- Ubuntu 20.04+ or CentOS 8+
- Nginx or Apache web server
- Redis for caching (optional)
- Supervisor for queue management
- SSL certificate management
Project Structure
The ThinkSparksX application follows Laravel 12 conventions with a modular structure:
ThinkSparksX/
├── app/
│   ├── Http/
│   │   ├── Controllers/          # Application controllers
│   │   ├── Middleware/           # Custom middleware
│   │   └── Requests/             # Form validation
│   ├── Models/                   # Eloquent models
│   ├── Services/                 # Business logic services
│   └── Providers/                # Service providers
├── database/
│   ├── migrations/               # Database schema
│   ├── seeders/                  # Sample data
│   └── factories/                # Model factories
├── resources/
│   └── js/                       # Vue 3 + Inertia frontend
│       ├── components/           # Reusable Vue components
│       ├── pages/                # Inertia page components
│       ├── layouts/              # Page layouts
│       └── composables/          # Vue composables
├── routes/                       # Application routes
├── config/                       # Configuration files
└── public/                       # Web root directory
Key directories: public/ is the web root, storage/ and
bootstrap/cache/ must be writable.
File & Folder Structure Overview
Understanding the file structure helps you customize and extend the application easily:
/resources/js → Vue 3 components and frontend logic
/resources/views → Blade templates and layouts
/public → Web assets, images, CSS, JS, and favicon
/routes → Web and API route definitions
/database → Migrations, seeders, and database structure
/config → Application configuration files
/.env → Environment configuration and API keys
/storage → File uploads, logs, and cache (must be writable)
/bootstrap/cache → Framework cache files (must be writable)
This structure follows Laravel conventions, making it easy for developers familiar with the framework to customize and extend.
Installation Guide
Follow this step-by-step guide to install ThinkSparksX on your server. The process is straightforward and takes about 10-15 minutes.
🚀 Method 1: Shared Hosting (cPanel)
This method is perfect for beginners using shared hosting services like Namecheap, HostGator, or GoDaddy.
Step 1: Access cPanel
- Login to your cPanel: Go to "https://yourdomain.com/cpanel"
- Enter your credentials: Use the username and password provided by your hosting provider
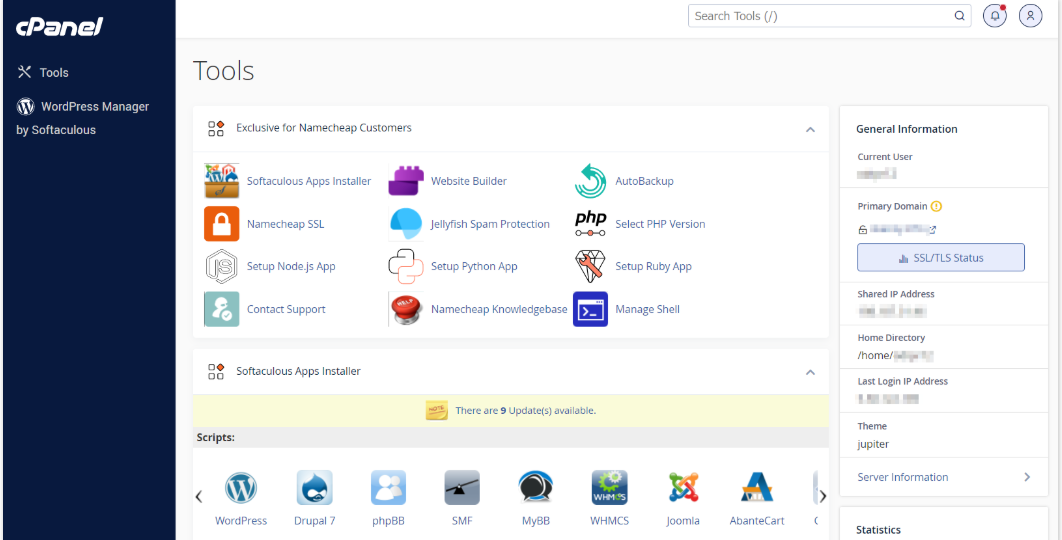
📸 cPanel dashboard showing the main interface and available tools
Step 2: Upload Files to Your Server
- Open File Manager: Click on "File Manager" in your cPanel
- Navigate to public_html: Go to the "public_html" folder (this is your website's root)
- Upload the ZIP file: Upload the "upload_this.zip" file from your download
- Extract the files: Right-click on the ZIP file and select "Extract"
- Clean up: Delete the ZIP file after successful extraction
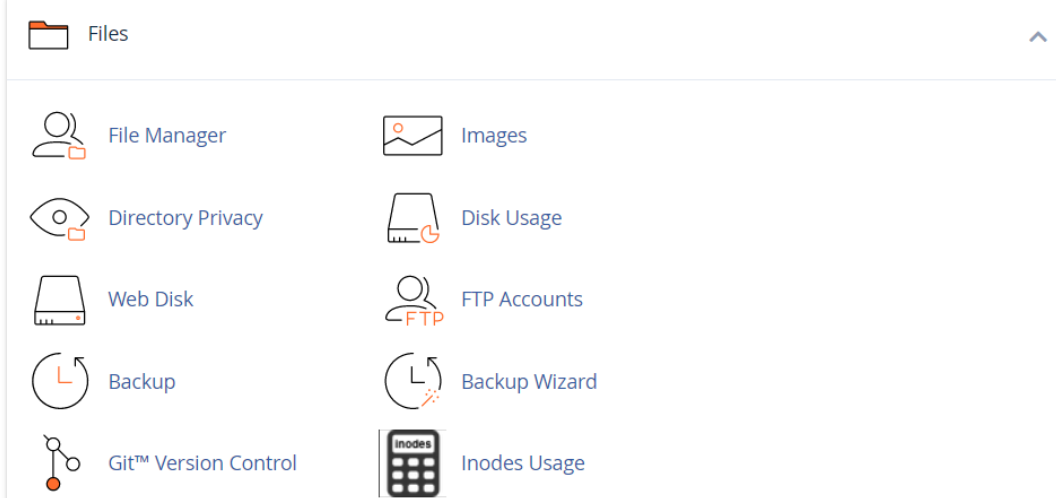
📸 cPanel File Manager showing file upload and management options
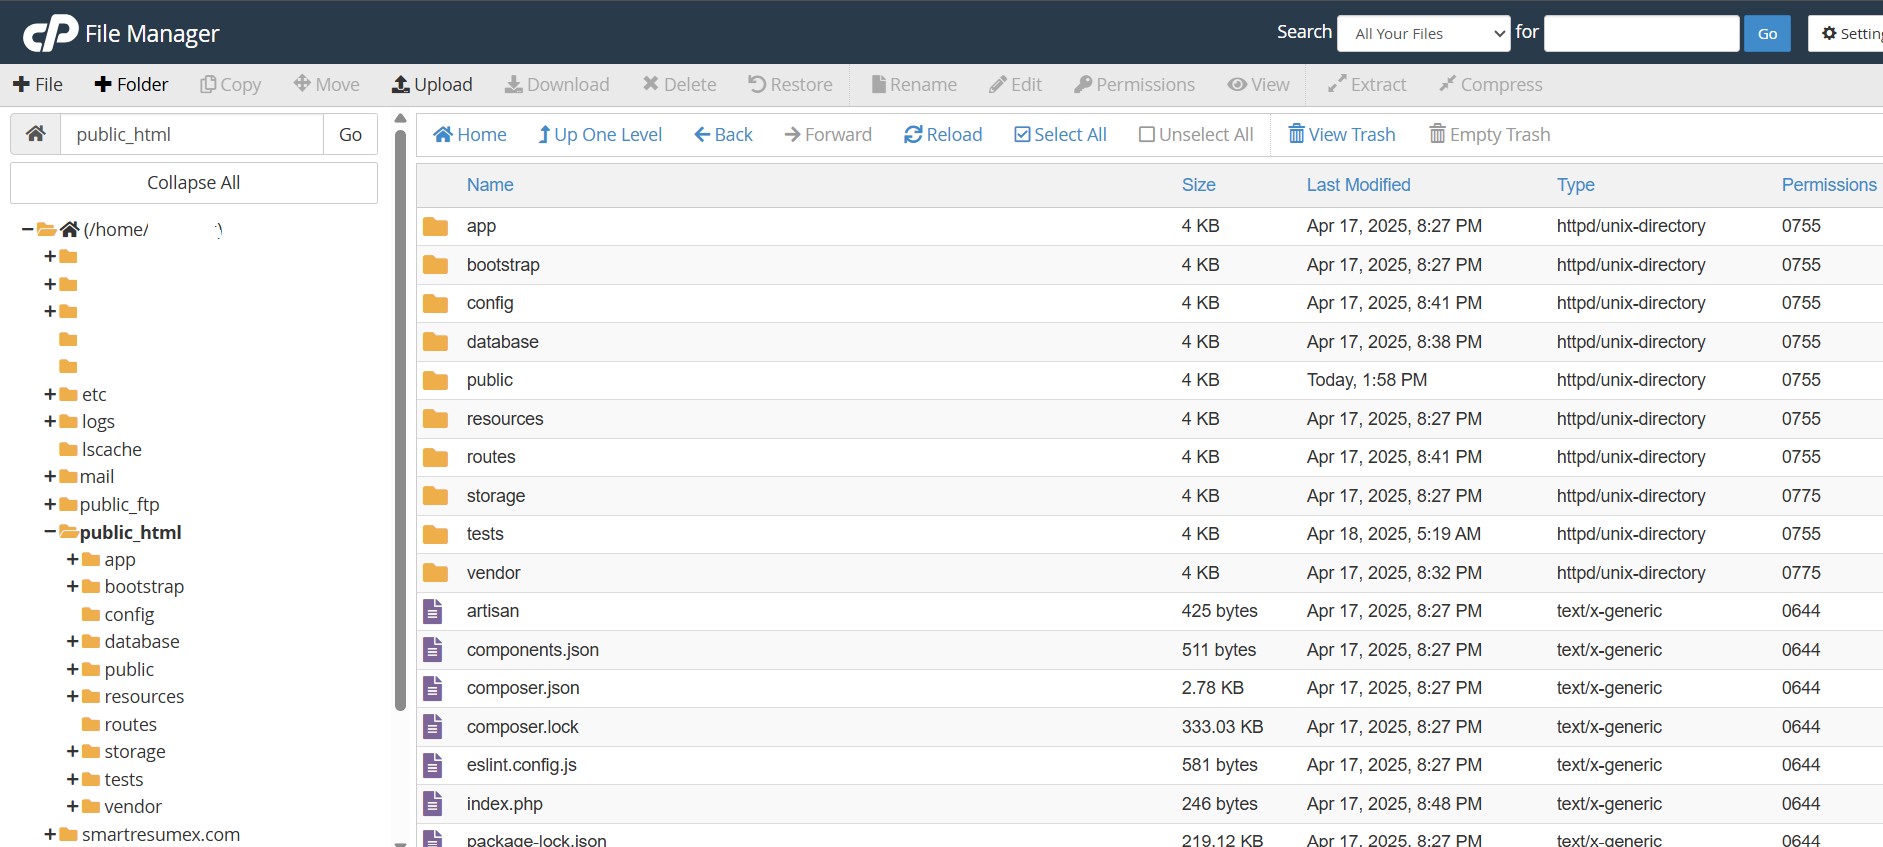
📸 public_html directory showing the uploaded and extracted files
Step 2: Set Web Root to Public Folder
Important: You must set your web root to the public folder, not the main
application folder.
- In cPanel: Go to "Domains" or "Subdomains"
- Set Document Root: Point to "public_html/public" instead of just "public_html"
- Alternative: Move all contents from "public" folder to "public_html"
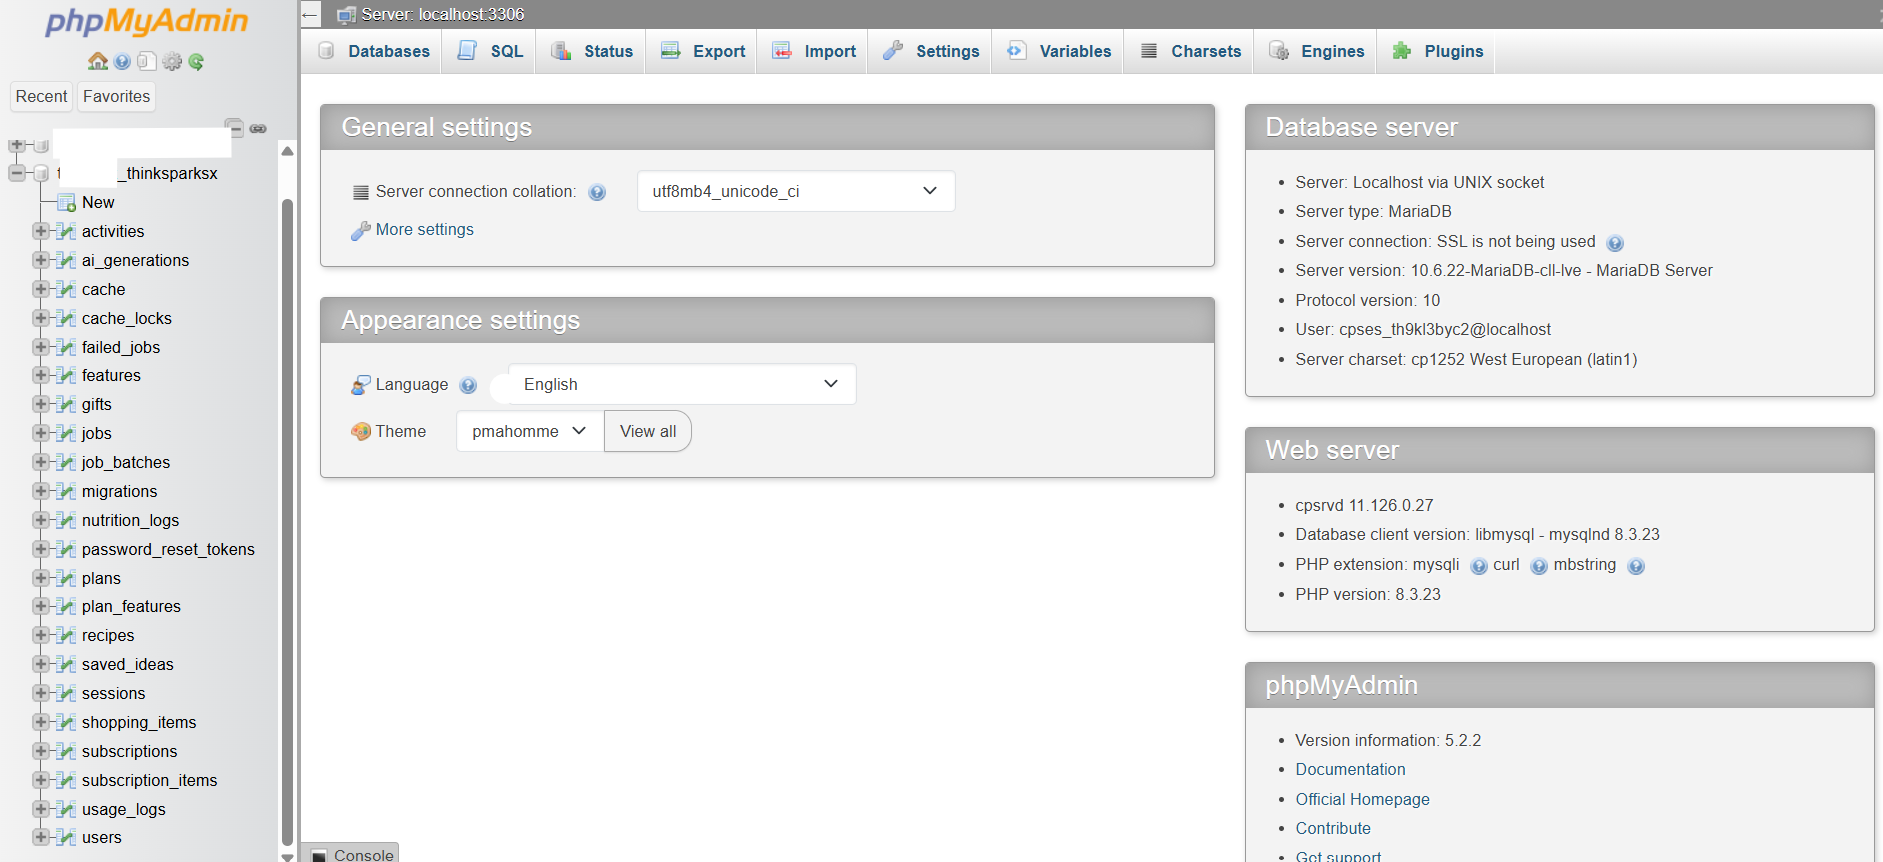
Step 3: Create Database
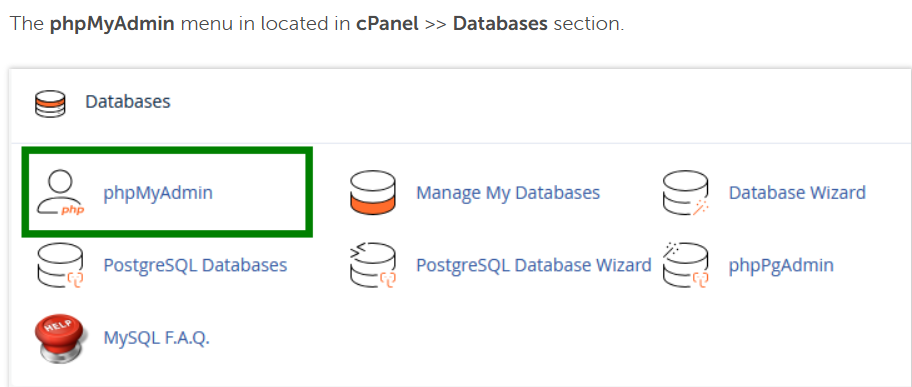
Creating a database in cPanel is straightforward. We'll use the "MySQL Databases" tool to set up everything you need.
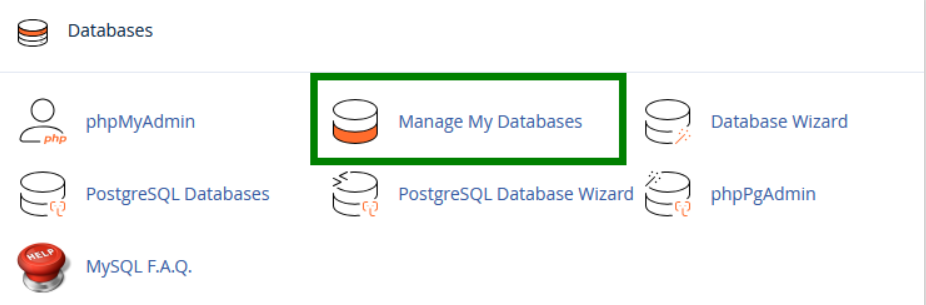
📸 Access the MySQL Databases section from your cPanel dashboard
Create the Database
- Find "Create New Database": Look for this section in the MySQL Databases page
- Enter database name: Choose a descriptive name (e.g., "thinksparksx_db")
- Click "Create Database": The system will create your database
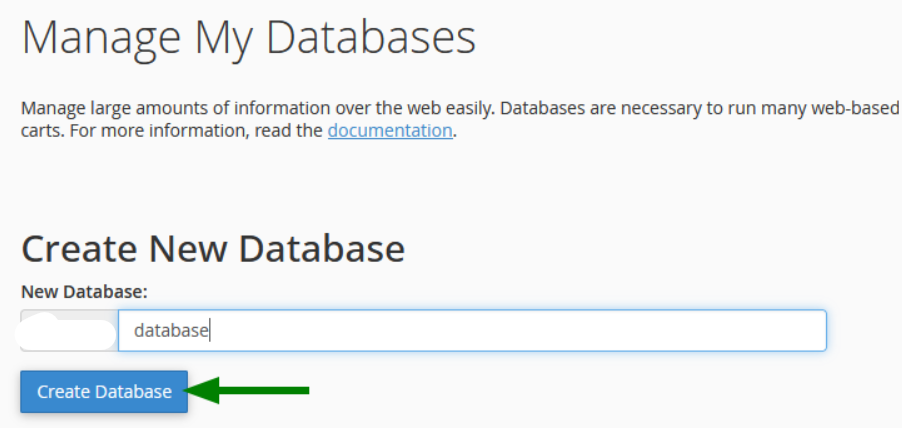
📸 Enter your database name and click Create Database
Create Database User
- Go to "Database Users" section: Find "Add New User"
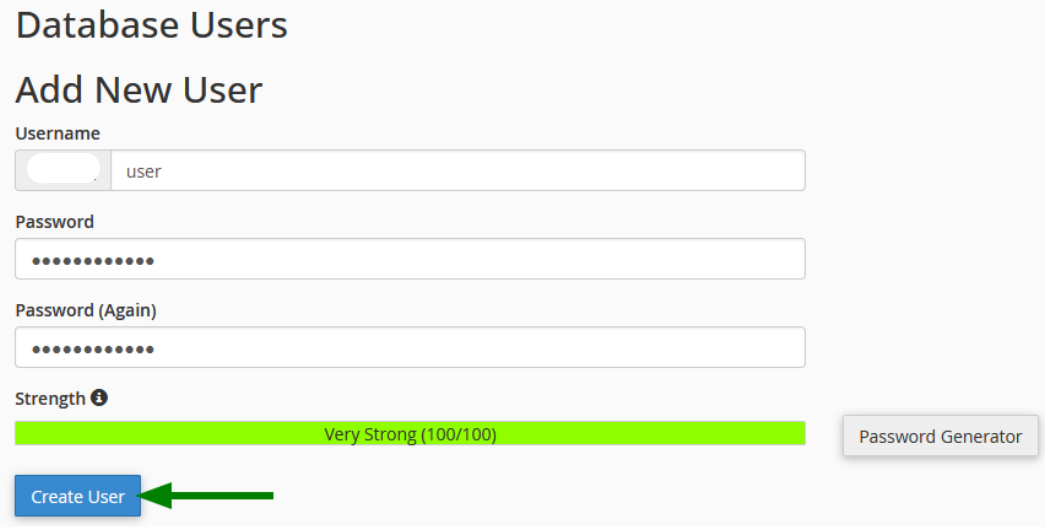
- Choose username: Create a unique username for your database
- Set password: Use the built-in password generator for security
- Click "Create User": Your database user will be created
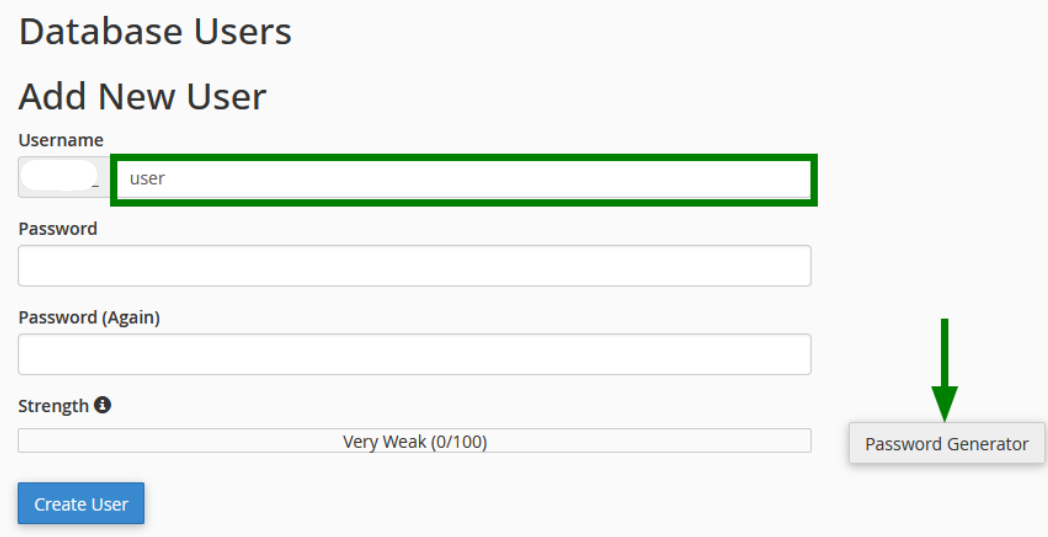
📸 Create a new database user with a secure password
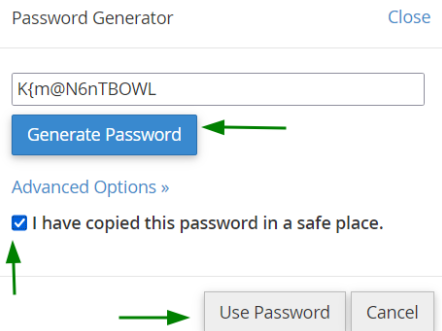
📸 Use the built-in password generator for maximum security
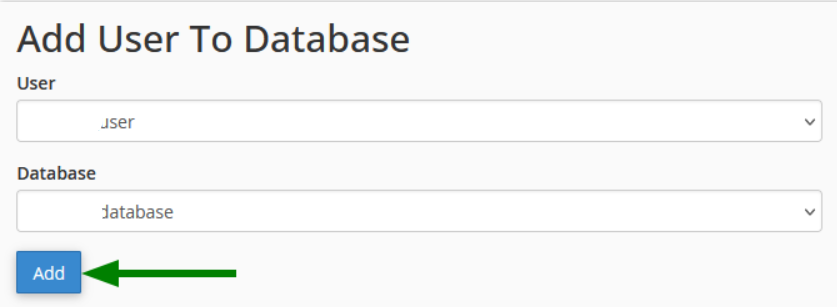
Assign User to Database
- Find "Add User To Database": Look for this section
- Select database and user: Choose the ones you just created
- Click "Add": You'll be taken to the privileges page
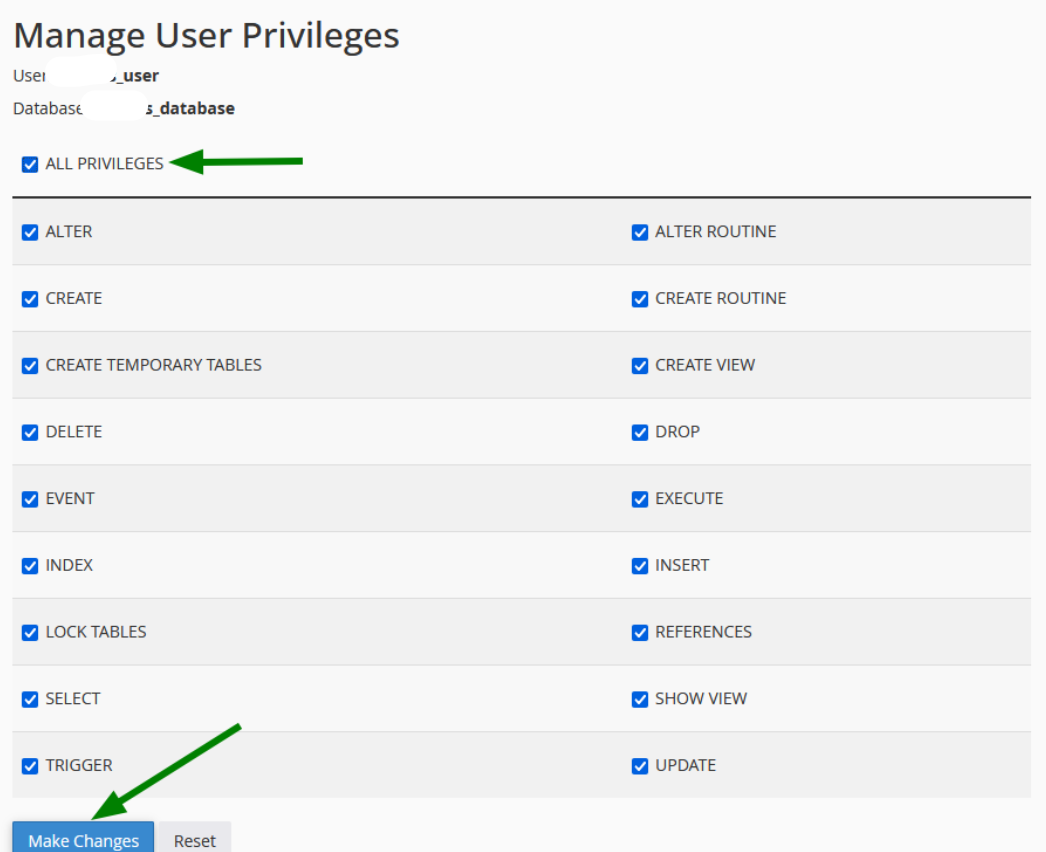
- Set privileges: Choose "ALL PRIVILEGES" for full access
- Click "Make Changes": Your user will be assigned to the database
📸 Select your database and user, then click Add
📸 Choose "ALL PRIVILEGES" for full database access
📸 Confirmation that user was successfully added to database
Verify Database Setup
Check that everything is set up correctly by viewing your current databases:
📸 View your created database in the Current Databases section
📸 View your created user in the Database Users section
📸 Verify user assignment in the Add User To Database section
Step 4: Configure Environment File
Before running the installation, you need to configure your environment settings:
4.1: Edit .env File
- Open .env file: Use File Manager to edit the
.envfile - Update database settings: Use the credentials you just created
- Set your domain: Update
APP_URLto your actual domain - Configure admin account: Set your admin email and password
4.2: Essential .env Settings
Core Settings
APP_NAME=ThinkSparksX
APP_ENV=production
APP_DEBUG=false
APP_URL=https://yourdomain.com
Database
DB_CONNECTION=mysql
DB_HOST=localhost
DB_DATABASE=your_database_name
DB_USERNAME=your_database_user
DB_PASSWORD=your_database_password
Admin Account
ADMIN_NAME="Your Name"
ADMIN_EMAIL=admin@yourdomain.com
ADMIN_PASSWORD=your_secure_password
Mail (Optional)
MAIL_MAILER=smtp
MAIL_HOST=smtp.yourdomain.com
MAIL_USERNAME=your_email
MAIL_PASSWORD=your_password
Step 5: Run the Installation
- Visit your website: Go to "https://yourdomain.com"
- Follow the installer: The system will automatically detect your setup
- Enter database details: Use the database credentials you just created
- Create admin account: Set up your first admin user
Step 6: Configure Payment & AI Services
After successful installation, configure these services for full functionality:
6.1: Stripe Payment Gateway
Add these to your .env file:
STRIPE_KEY=pk_test_your_test_publishable_key
STRIPE_SECRET=sk_test_your_test_secret_key
STRIPE_WEBHOOK_SECRET=whsec_your_webhook_secret
6.2: AI Provider Configuration
Choose your default AI provider and add the corresponding API key:
AI_DEFAULT_PROVIDER=openai
OPENAI_API_KEY=sk-your_openai_api_key_here
GOOGLE_GEMINI_API_KEY=your_gemini_api_key_here
DEEPSEEK_API_KEY=your_deepseek_api_key_here
6.3: Where to Get API Keys
- OpenAI: Get from OpenAI Platform - starts with "sk-"
- Google Gemini: Get from Google AI Studio
- DeepSeek: Get from DeepSeek Platform
- Stripe: Get from Stripe Dashboard
php artisan optimize:clear && php artisan config:cache to clear and rebuild the configuration
cache.
💻 Method 2: VPS/Dedicated Server (SSH)
This method is for advanced users with server access via SSH.
Step 1: Upload and Extract Files
# Upload files to your server
scp upload_this.zip user@your-server:/var/www/

# SSH into your server
ssh user@your-server

# Extract files
cd /var/www
unzip upload_this.zip
mv thinksparksx/* .
rmdir thinksparksx
Step 2: Set Permissions
# Set correct permissions
sudo chown -R www-data:www-data /var/www
sudo chmod -R 755 /var/www
sudo chmod -R 775 storage bootstrap/cache
Step 3: Install Dependencies
# Install PHP dependencies
composer install --no-dev --prefer-dist --optimize-autoloader

# Install Node.js dependencies (if building assets)
npm ci
npm run build
Step 4: Configure Environment
This is where you'll set up your application configuration. Follow these steps carefully:
4.1: Copy Environment File
# Copy environment file
cp .env.example .env
4.2: Edit .env File
Open the .env file and configure these essential settings:
Core Application
APP_NAME=ThinkSparksX
APP_ENV=production
APP_DEBUG=false
APP_URL=https://your-domain.com
Database Configuration
DB_CONNECTION=mysql
DB_HOST=127.0.0.1
DB_PORT=3306
DB_DATABASE=your_database_name
DB_USERNAME=your_database_user
DB_PASSWORD=your_database_password
Mail Configuration
MAIL_MAILER=smtp
MAIL_HOST=smtp.example.com
MAIL_PORT=587
MAIL_USERNAME=your_email_username
MAIL_PASSWORD=your_email_password
MAIL_ENCRYPTION=tls
MAIL_FROM_ADDRESS=hello@your-domain.com
MAIL_FROM_NAME="${APP_NAME}"
Admin User Setup
ADMIN_NAME="Your Name"
ADMIN_EMAIL=admin@your-domain.com
ADMIN_PASSWORD=your_secure_password
4.3: Generate Application Key
# Generate application key
php artisan key:generate
4.4: Create Storage Link
# Create storage link
php artisan storage:link
Step 5: Database Setup
# Run database migrations
php artisan migrate --force

# Seed sample data (optional)
php artisan db:seed --force
Step 6: Configure Payment & AI Services
Set up your payment gateway and AI providers for full functionality:
6.1: Stripe Payment Gateway
Add these to your .env file:
STRIPE_KEY=pk_test_your_test_publishable_key
STRIPE_SECRET=sk_test_your_test_secret_key
STRIPE_WEBHOOK_SECRET=whsec_your_webhook_secret
6.2: AI Provider Configuration
Choose your default AI provider and add the corresponding API key:
AI_DEFAULT_PROVIDER=openai
OPENAI_API_KEY=sk-your_openai_api_key_here
GOOGLE_GEMINI_API_KEY=your_gemini_api_key_here
DEEPSEEK_API_KEY=your_deepseek_api_key_here
6.3: Where to Get API Keys
- OpenAI: Get from OpenAI Platform - starts with "sk-"
- Google Gemini: Get from Google AI Studio
- DeepSeek: Get from DeepSeek Platform
- Stripe: Get from Stripe Dashboard
php artisan optimize:clear && php artisan config:cache to clear and rebuild the configuration
cache.
Step 7: Optimize for Production
# Clear and rebuild cache
php artisan optimize:clear
php artisan config:cache
php artisan route:cache
php artisan view:cache
⚙️ Post-Installation Setup
Configure Cron Jobs
Add these cron jobs to your server for automated tasks:
# Open crontab editor
crontab -e

# Add these lines (replace /var/www with your actual path)
* * * * * php /var/www/artisan schedule:run >> /dev/null 2>&1
*/2 * * * * php /var/www/artisan queue:work --stop-when-empty --timeout=60 --sleep=3 >> /dev/null 2>&1
Set Up Queue Workers (VPS Only)
For better performance on VPS servers, set up Supervisor to manage queue workers:
# Install Supervisor
sudo apt-get install supervisor

# Create configuration file
sudo nano /etc/supervisor/conf.d/thinksparksx.conf

# Add this configuration:
[program:thinksparksx-worker]
process_name=%(program_name)s_%(process_num)02d
command=php /var/www/artisan queue:work --sleep=3 --tries=3
autostart=true
autorestart=true
user=www-data
numprocs=2
redirect_stderr=true
stdout_logfile=/var/www/storage/logs/worker.log
🎯 Installation Checklist
• Files uploaded and extracted ✓
• Web root set to public folder ✓
• Database created and configured ✓
• Environment file configured ✓
• Installation completed ✓
• Payment & AI services configured ✓
• Dependencies installed (VPS) ✓
• Database migrations run (VPS) ✓
• Admin account created ✓
• Cron jobs configured ✓
• Queue workers running (VPS) ✓
Hosting & Deployment
Shared Hosting
- Set public as web root; make storage and bootstrap/cache writable
- Use cron for scheduler and queue
- Build locally if SSH is unavailable
VPS
- Run queue:work under Supervisor/systemd
- Enable PHP Opcache
- Use Redis for cache/session if available
Nginx (example)
root /var/www/app/public;
index index.php;
location / { try_files $uri $uri/ /index.php?$query_string; }
location ~ \.php$ {
  include fastcgi_params;
  fastcgi_pass php-fpm;
  fastcgi_param SCRIPT_FILENAME $document_root$fastcgi_script_name;
}
Apache
- DocumentRoot points to public; AllowOverride All for .htaccess
Stripe Setup (SaaS)
Setting up Stripe for your ThinkSparksX SaaS is straightforward. Follow this step-by-step guide to get your payment gateway working in minutes.
1) Create Products & Prices
First, you'll need to create products and pricing plans in your Stripe dashboard. This is where you'll define what users can purchase.
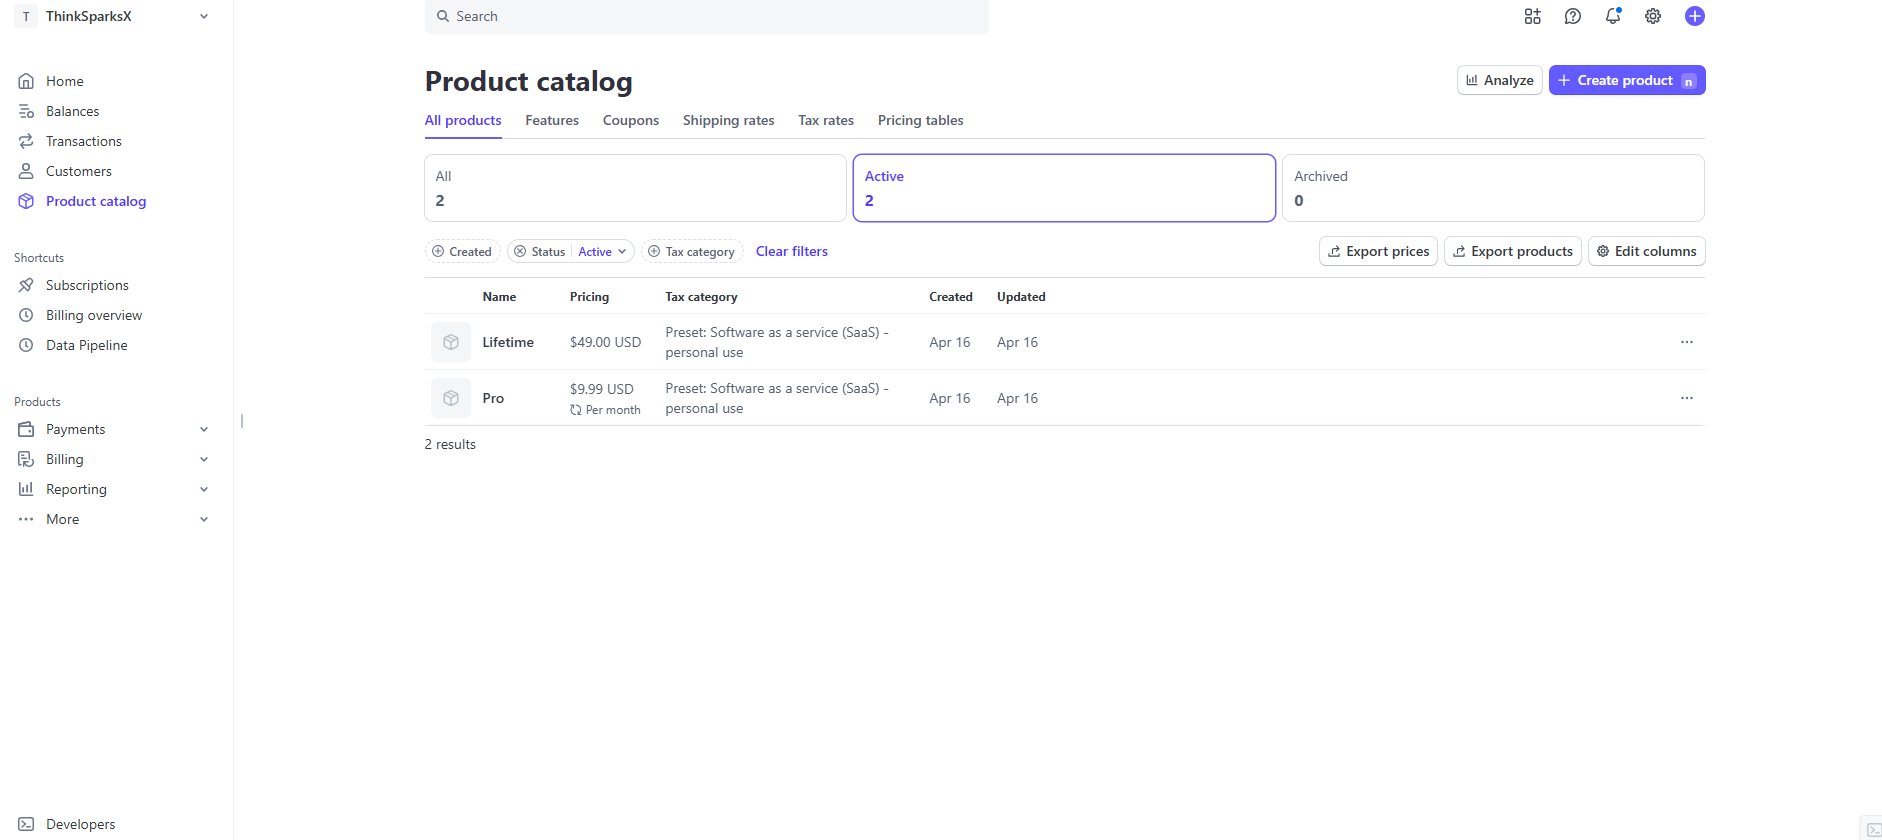
📸 Access the Products section in your Stripe Dashboard
- Log into Stripe Dashboard: Go to dashboard.stripe.com
- Navigate to Products: Click on "Products" in the left sidebar
- Create New Product: Click "Add product" to create your first subscription plan
- Set Product Details: Enter name, description, and pricing information
- Save Product: Click "Save product" to create your first plan
📸 Fill in product details including name, description, and pricing
Configure Pricing Plans
For ThinkSparksX, you'll typically want to create these plans:
- Free Plan: Basic features with limited generations
- Pro Plan: Monthly/yearly subscription with higher limits
- Lifetime Plan: One-time payment for unlimited access
📸 Configure pricing options including recurring billing and one-time payments
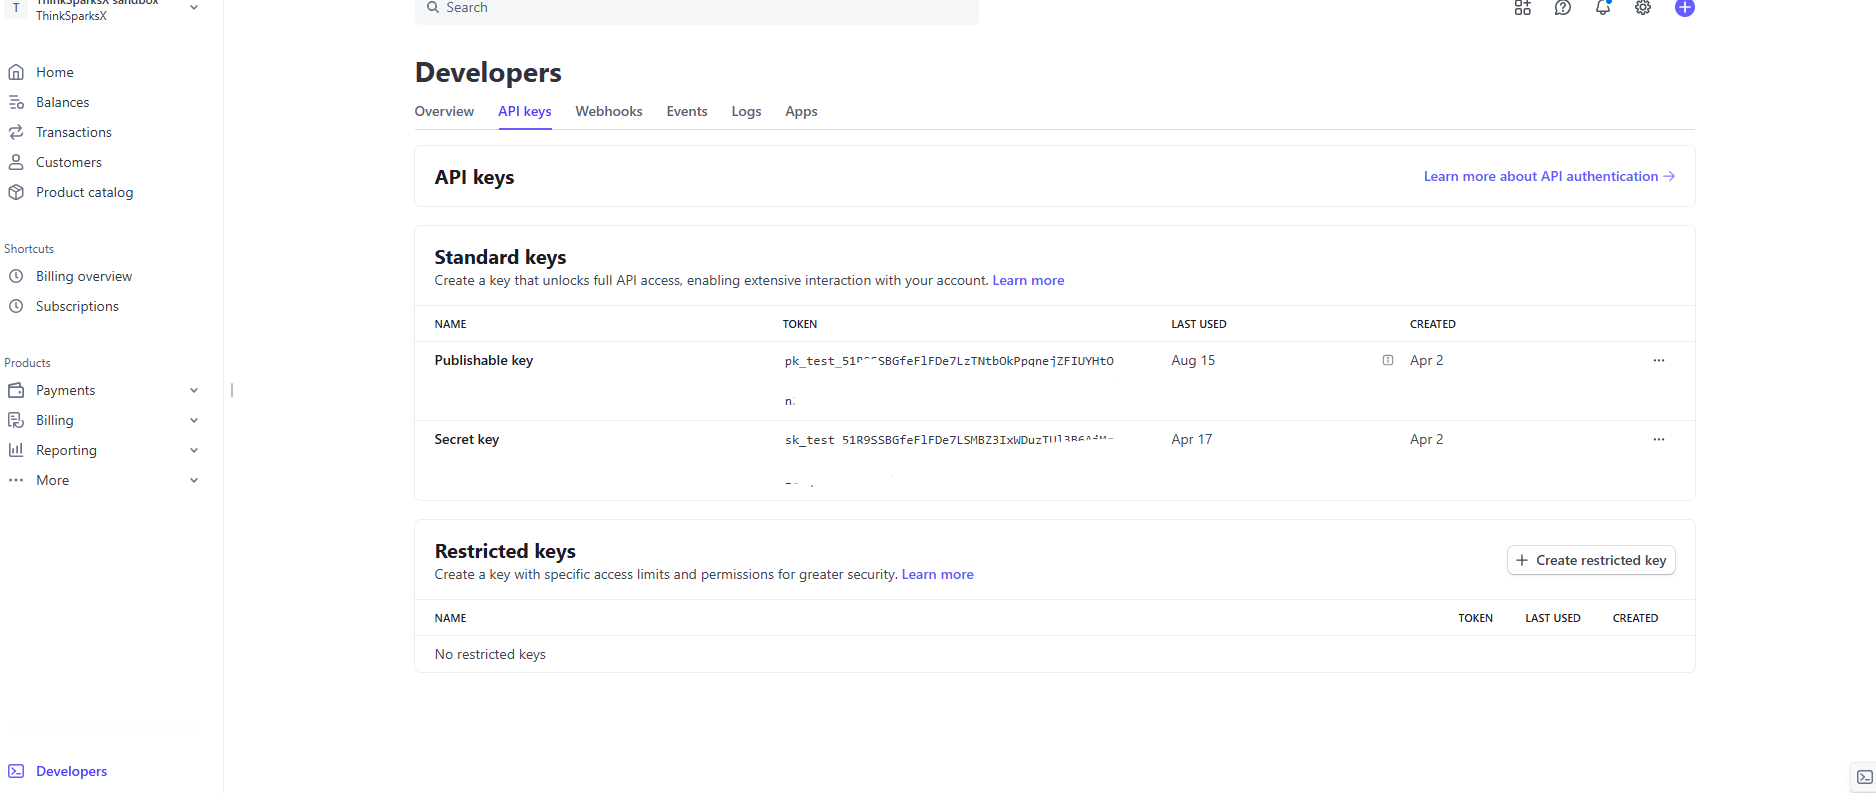
Get Your API Keys
After creating your products, you'll need to get your API keys:
- Go to Developers → API keys: In your Stripe dashboard
- Copy Publishable Key: Starts with "pk_test_" or "pk_live_"
- Copy Secret Key: Starts with "sk_test_" or "sk_live_"
- Add to .env file: Update your environment configuration
📸 Copy your publishable and secret keys from the API keys section
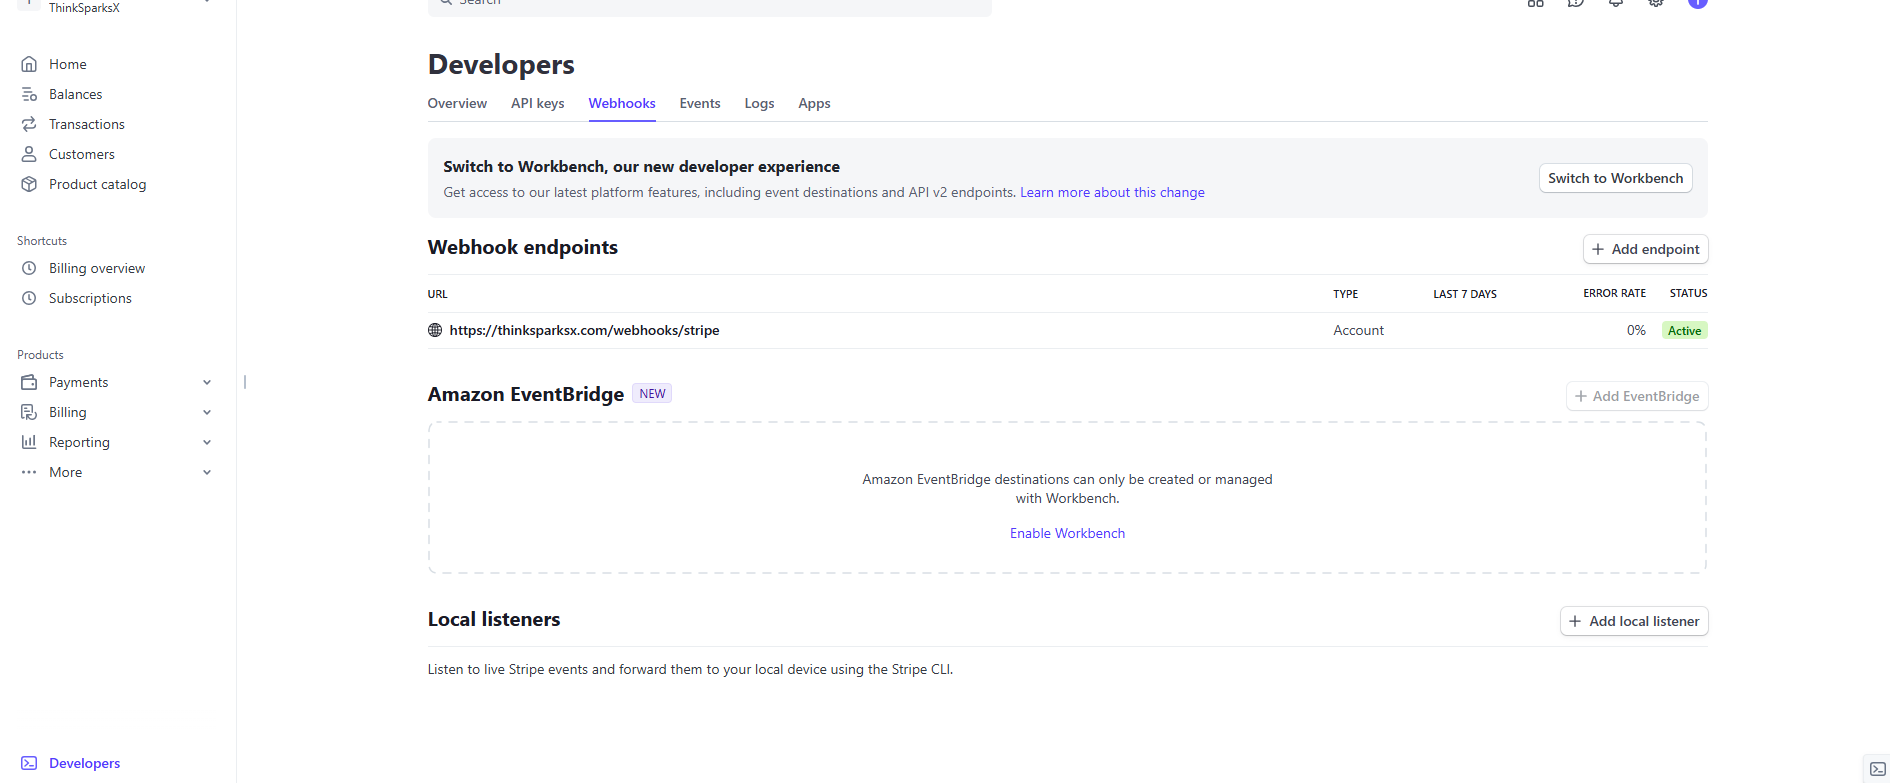
2) Stripe Webhook Setup
For the subscription system to function properly, you need to configure Stripe webhooks to handle payment events and subscription status changes.
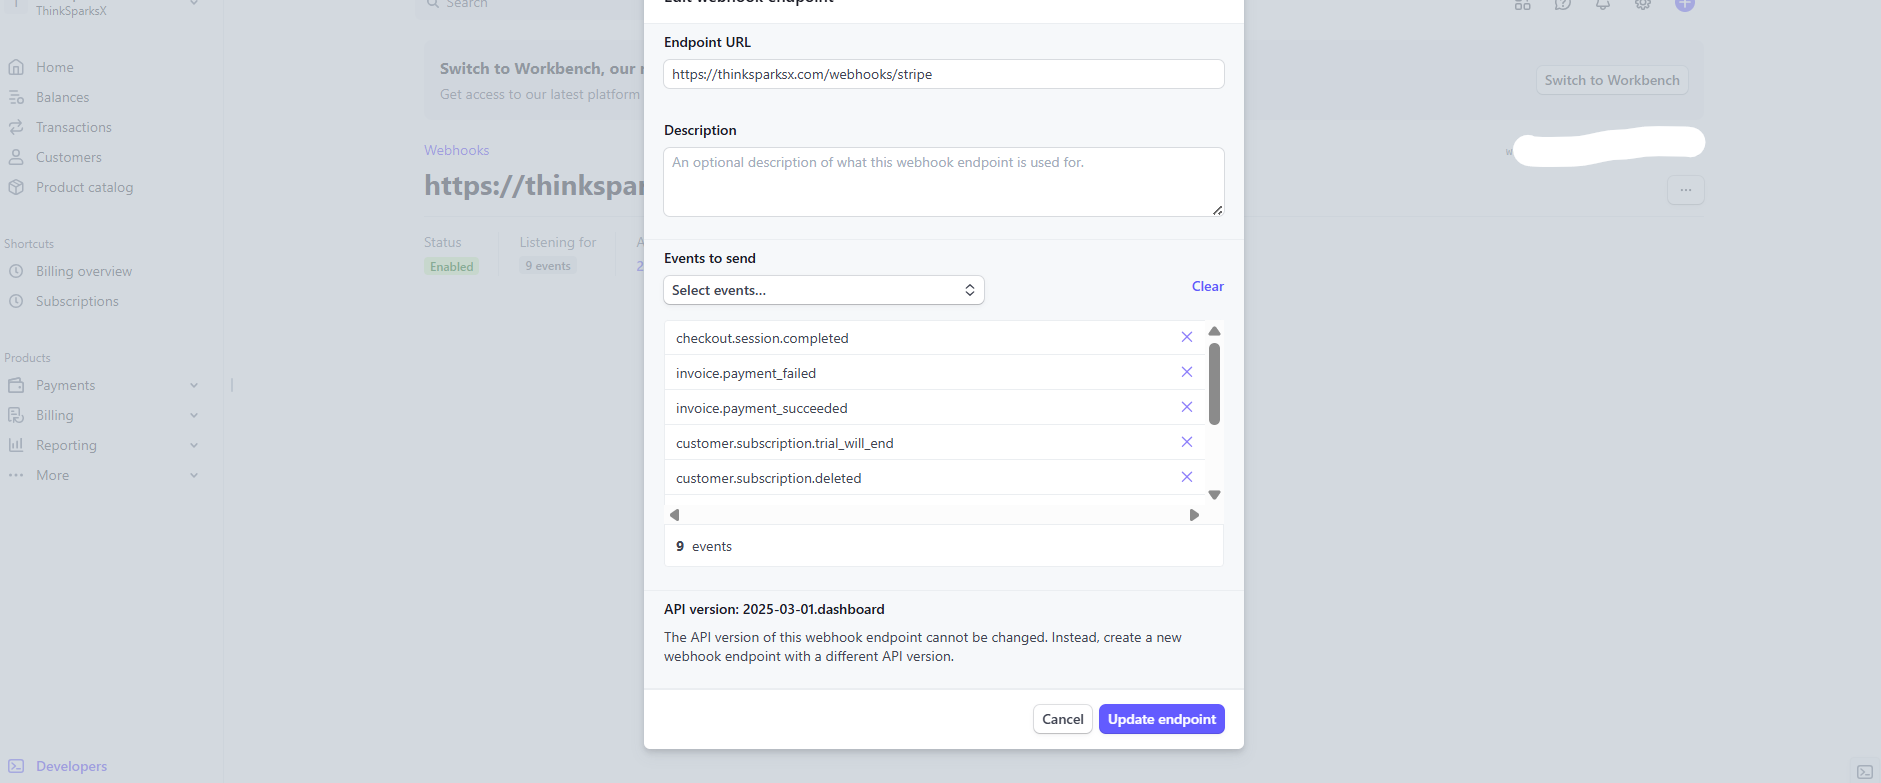
Configure Webhook in Stripe Dashboard
- Log in to your Stripe Dashboard
- Navigate to Developers → Webhooks
- Click "Add endpoint"
- In the Endpoint URL field, enter:
https://your-domain.com/webhooks/stripe - Select the following events to listen to:
checkout.session.completedinvoice.payment_failedinvoice.payment_succeededcustomer.subscription.trial_will_endcustomer.subscription.deletedcustomer.subscription.updatedcustomer.subscription.createdpayment_intent.payment_failedpayment_intent.succeeded
Click "Add endpoint" to save.
Configure Webhook Signing Secret
After creating the webhook endpoint, Stripe will generate a signing secret. You need to add this to your .env file:
STRIPE_WEBHOOK_SECRET=whsec_your_webhook_secret_here
This secret is used to verify that webhook requests are genuinely from Stripe and not malicious actors.
Testing Webhooks
Stripe provides tools to test your webhook endpoints:
- In your Stripe Dashboard, go to the webhook endpoint you created
- Click the "..." menu and select "Send test webhook"
- Select an event type (e.g., customer.subscription.created)
- Click "Send test webhook"
- Check your application logs to verify the webhook was received and processed correctly
Webhook Security
The application includes security measures to protect webhook endpoints:
- All webhook requests are verified using the signing secret
- Only events from your Stripe account will be processed
- Webhook processing is logged for debugging and auditing
Never store card data. Use Stripe-hosted flows and verify webhook signatures.
3) Testing Your Stripe Integration
Before going live, thoroughly test your Stripe integration using test cards and test mode.
Test Mode vs Live Mode
- Test Mode: Use test API keys (start with "pk_test_" and "sk_test_")
- Live Mode: Use live API keys (start with "pk_live_" and "sk_live_")
- Test Cards: Use Stripe's test card numbers for testing payments
Recommended Test Cards
• Successful Payment: 4242 4242 4242 4242
• Declined Payment: 4000 0000 0000 0002
• Requires Authentication: 4000 0025 0000 3155
• Expired Card: 4000 0000 0000 0069
• Insufficient Funds: 4000 0000 0000 9995
Testing Checklist
- ✅ Test successful payments with various test cards
- ✅ Test failed payments to ensure proper error handling
- ✅ Test subscription creation and recurring billing
- ✅ Test webhook delivery and processing
- ✅ Test subscription cancellation and refunds
4) Going Live with Stripe
Once you're satisfied with testing, switch to live mode to start accepting real payments.
Live Mode Checklist
- Switch to Live Keys: Replace test keys with live keys in your .env file
- Update Webhook URL: Change webhook endpoint to your live domain
- Test Live Mode: Make a small test purchase with a real card
- Monitor Transactions: Watch your Stripe dashboard for live transactions
- Set Up Monitoring: Configure Stripe alerts for failed payments
AI Providers
- Supported: OpenAI, Google Gemini, DeepSeek
- Set AI_DEFAULT_PROVIDER and corresponding API key
- Control costs: set token/timeouts, add retries with backoff, enable mock mode for demos
Demo Mode
- No public admin demo. Allow free registration with daily generation limits.
- Stripe in test mode; optionally disable checkout initiation in public demo.
- Mock AI or cache responses to avoid costs; throttle AI/image endpoints.
- Nightly data reset recommended; hide destructive/admin routes.
Security Checklist
- APP_ENV=production and APP_DEBUG=false; .env not public
- CSRF, role/permission checks on admin routes
- Uploads validated (MIME/extension/size), safe storage, unique names
- Rate‑limit auth, AI generation, uploads
- Stripe webhook signing; no card data stored
- HTTPS; consider HSTS and security headers
- Avoid logging secrets; rotate logs
Cron & Queue
Use cron for the scheduler and queue on shared hosting. On VPS, run a persistent queue worker via Supervisor/systemd.
* * * * * php /path/to/artisan schedule:run >> /dev/null 2>&1
*/2 * * * * php /path/to/artisan queue:work --stop-when-empty --timeout=60 --sleep=3 >> /dev/null 2>&1
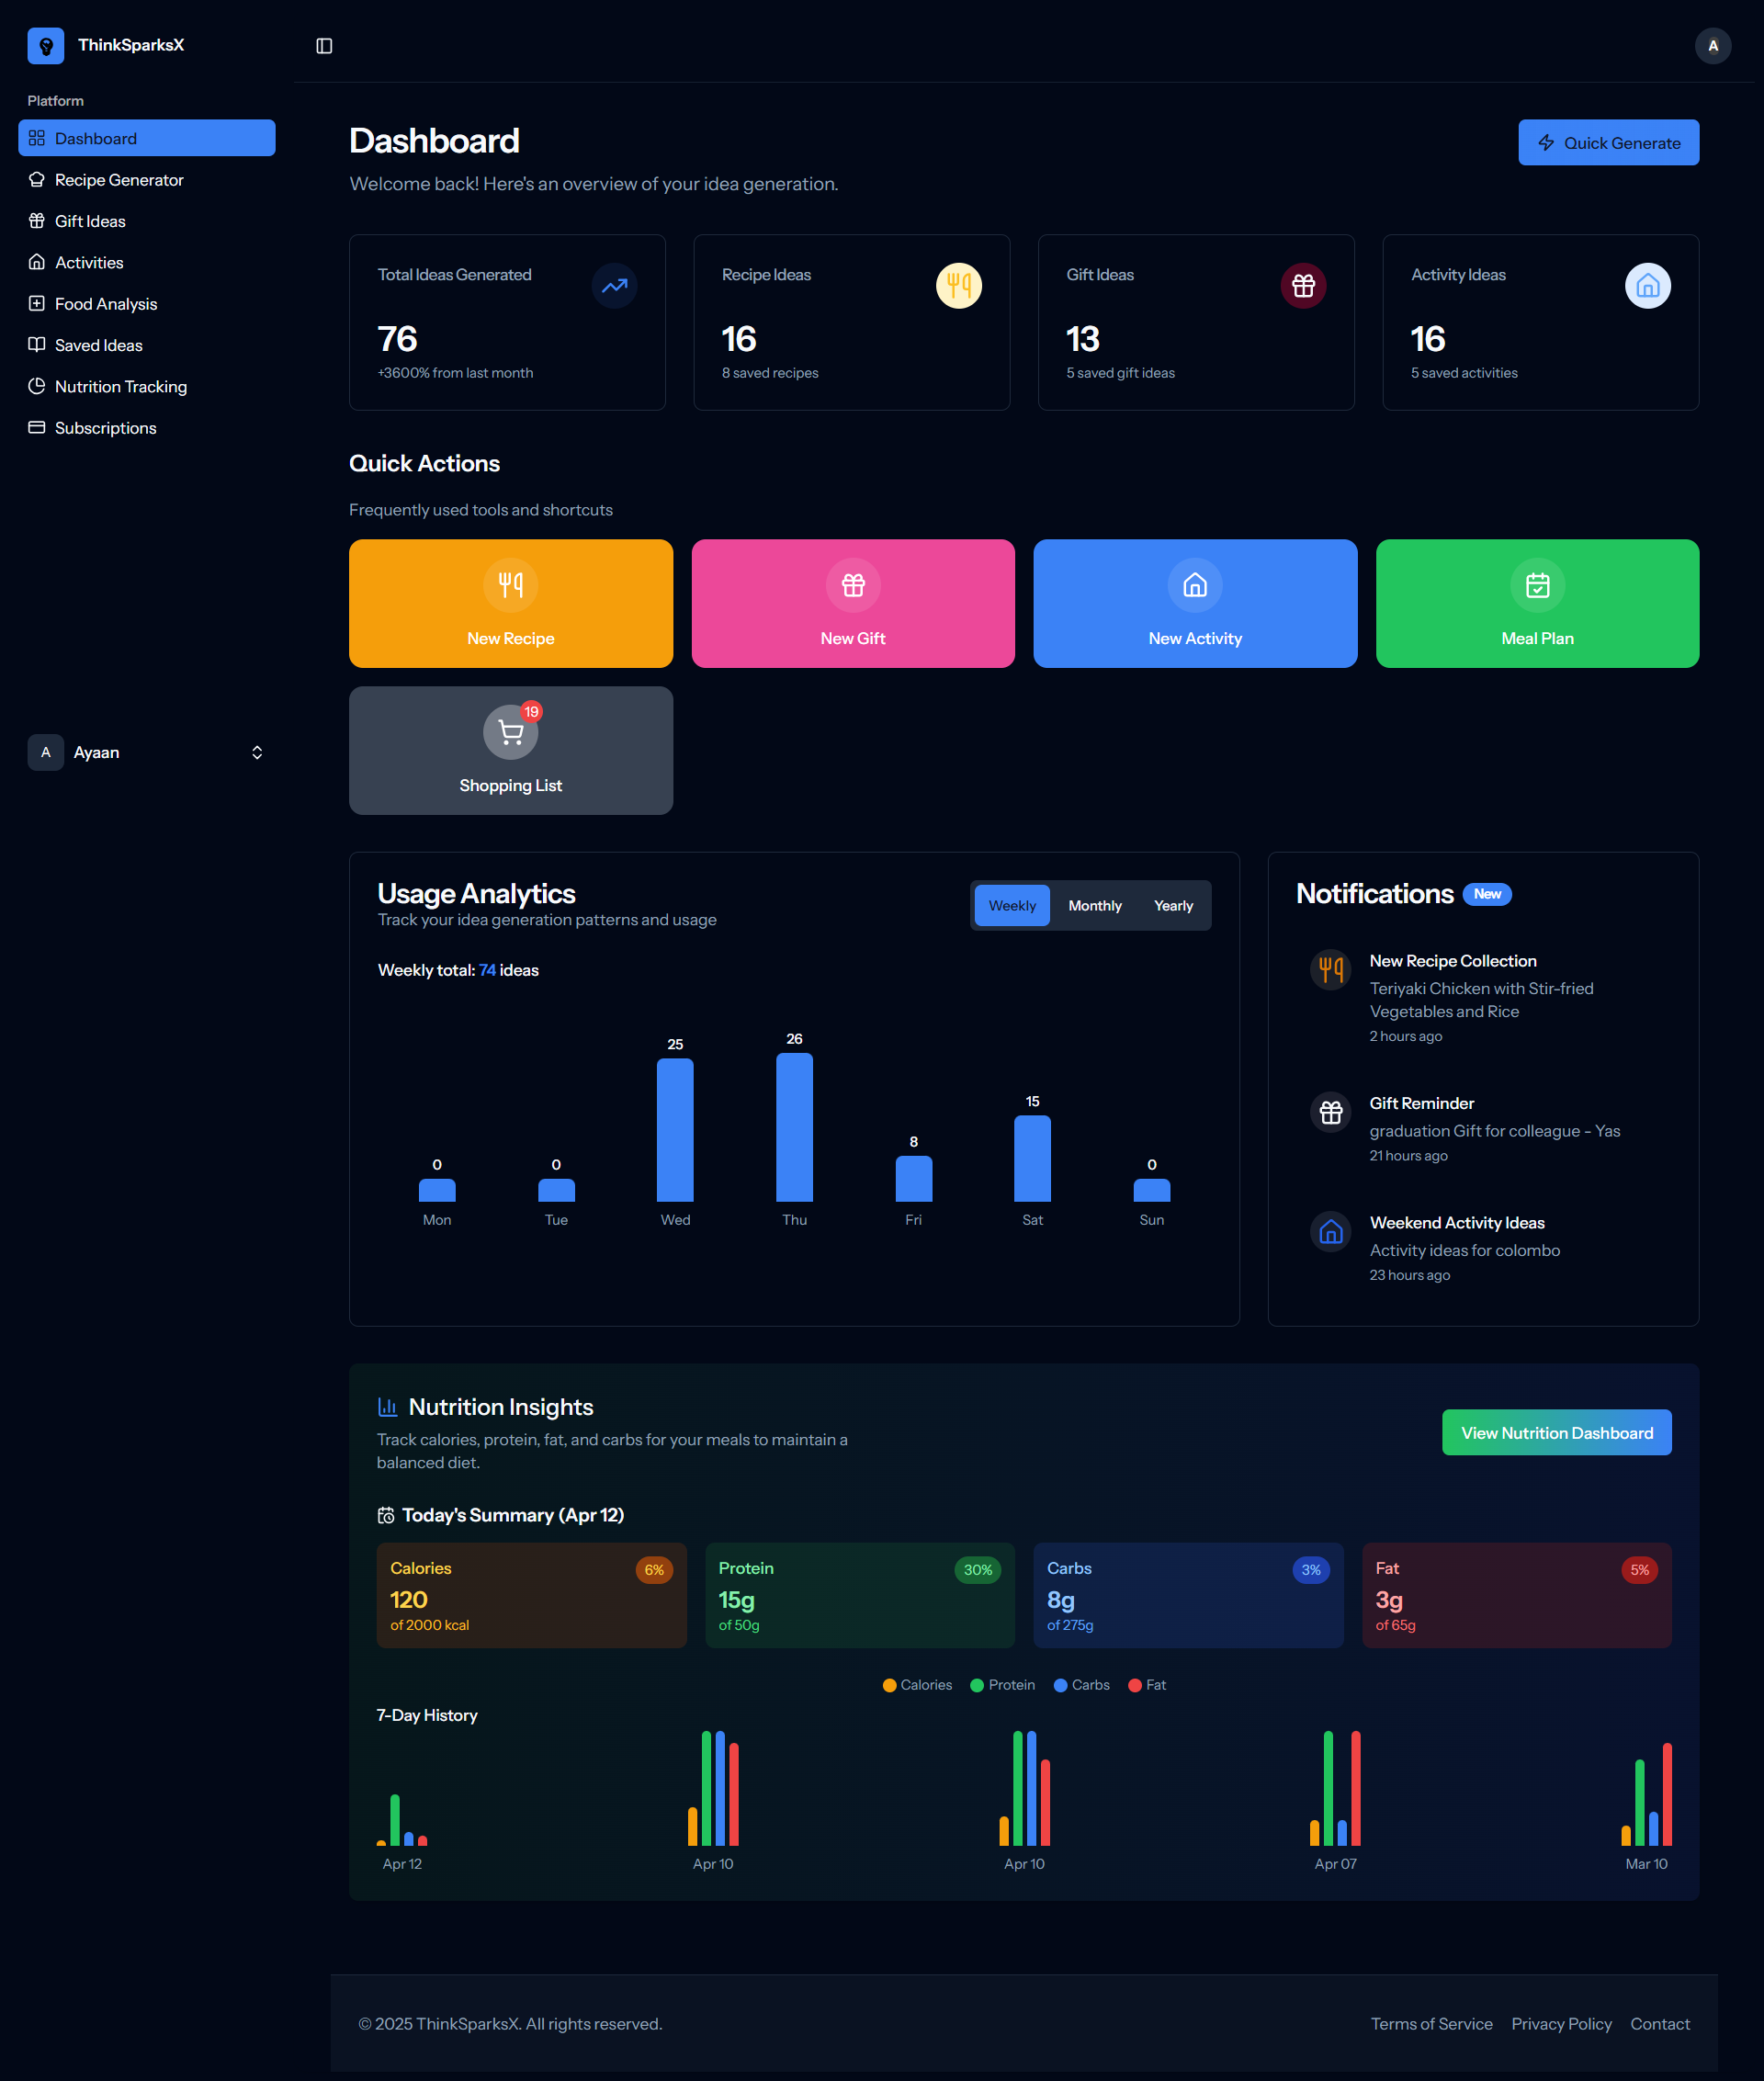
Module: Dashboard
Overview of stats, recent notifications, analytics, nutrition trends, and quick actions to generators and meal planning.
- Stats cards: total ideas and per‑category usage
- Notifications: latest saved recipe/gift/activity
- Analytics tabs: weekly/monthly/yearly
- Quick actions: New Recipe, New Gift, New Activity, Meal Plan, Shopping List
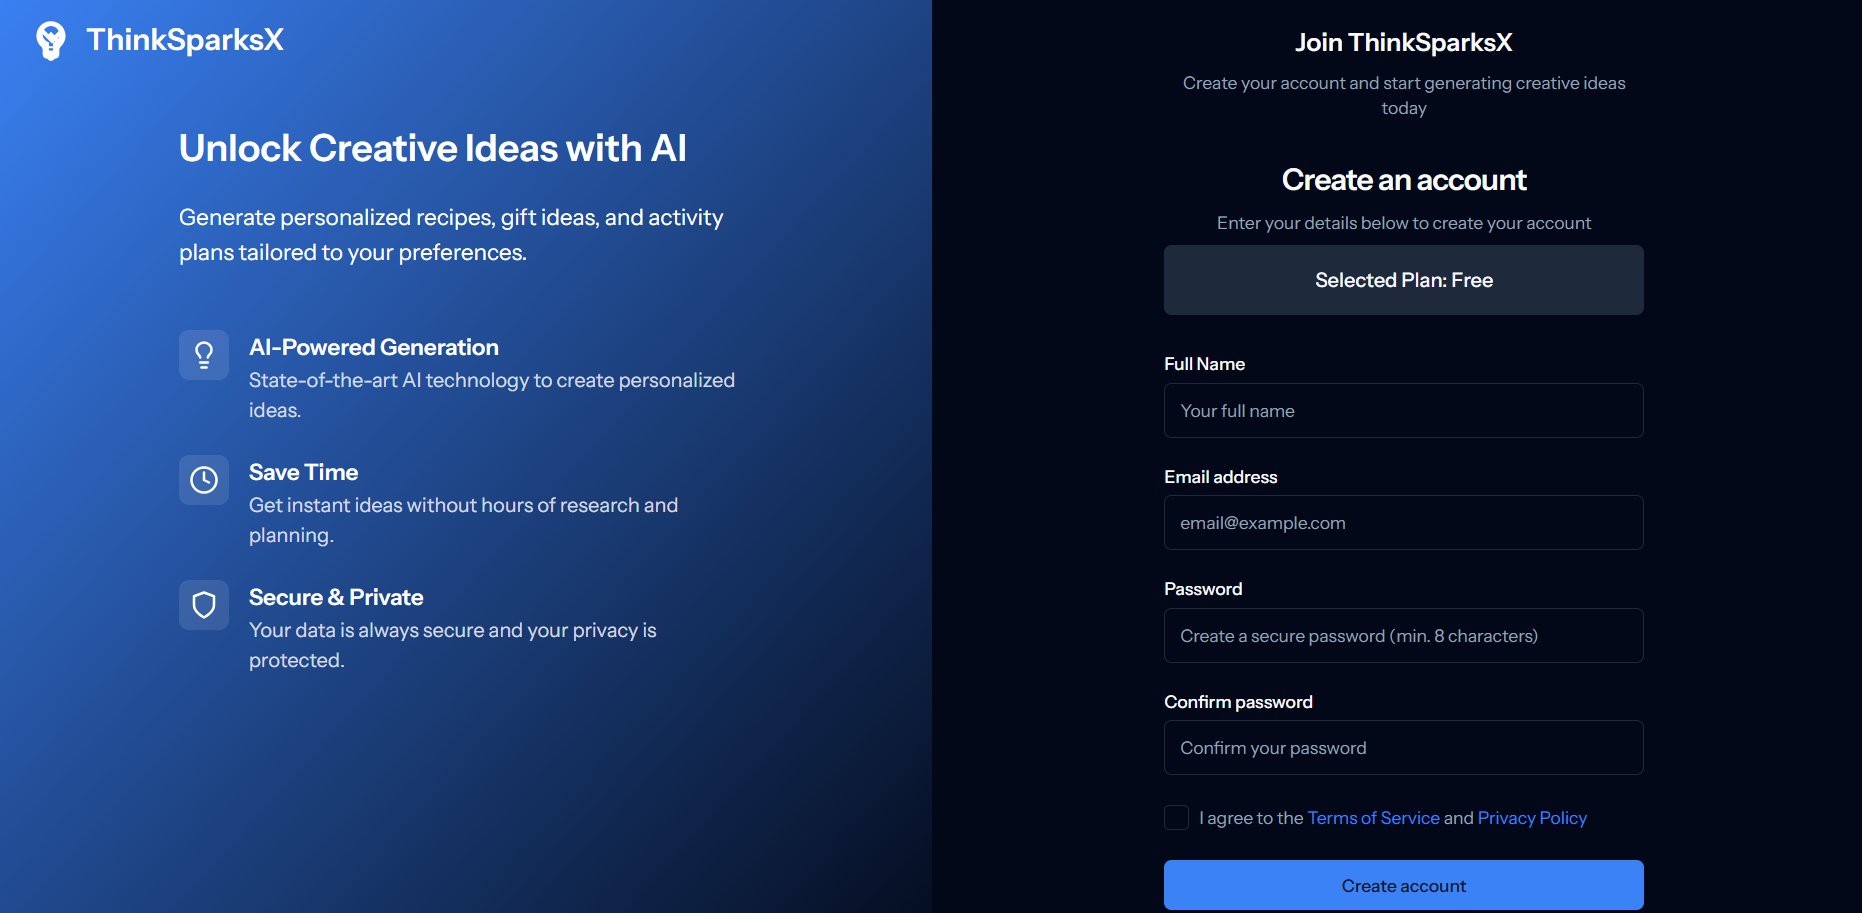
Module: User Registration
New users can create accounts to access the platform's features. The registration process is streamlined and user-friendly.
- Simple registration form with email verification
- Automatic free plan assignment
- Welcome email and onboarding
- Secure password requirements
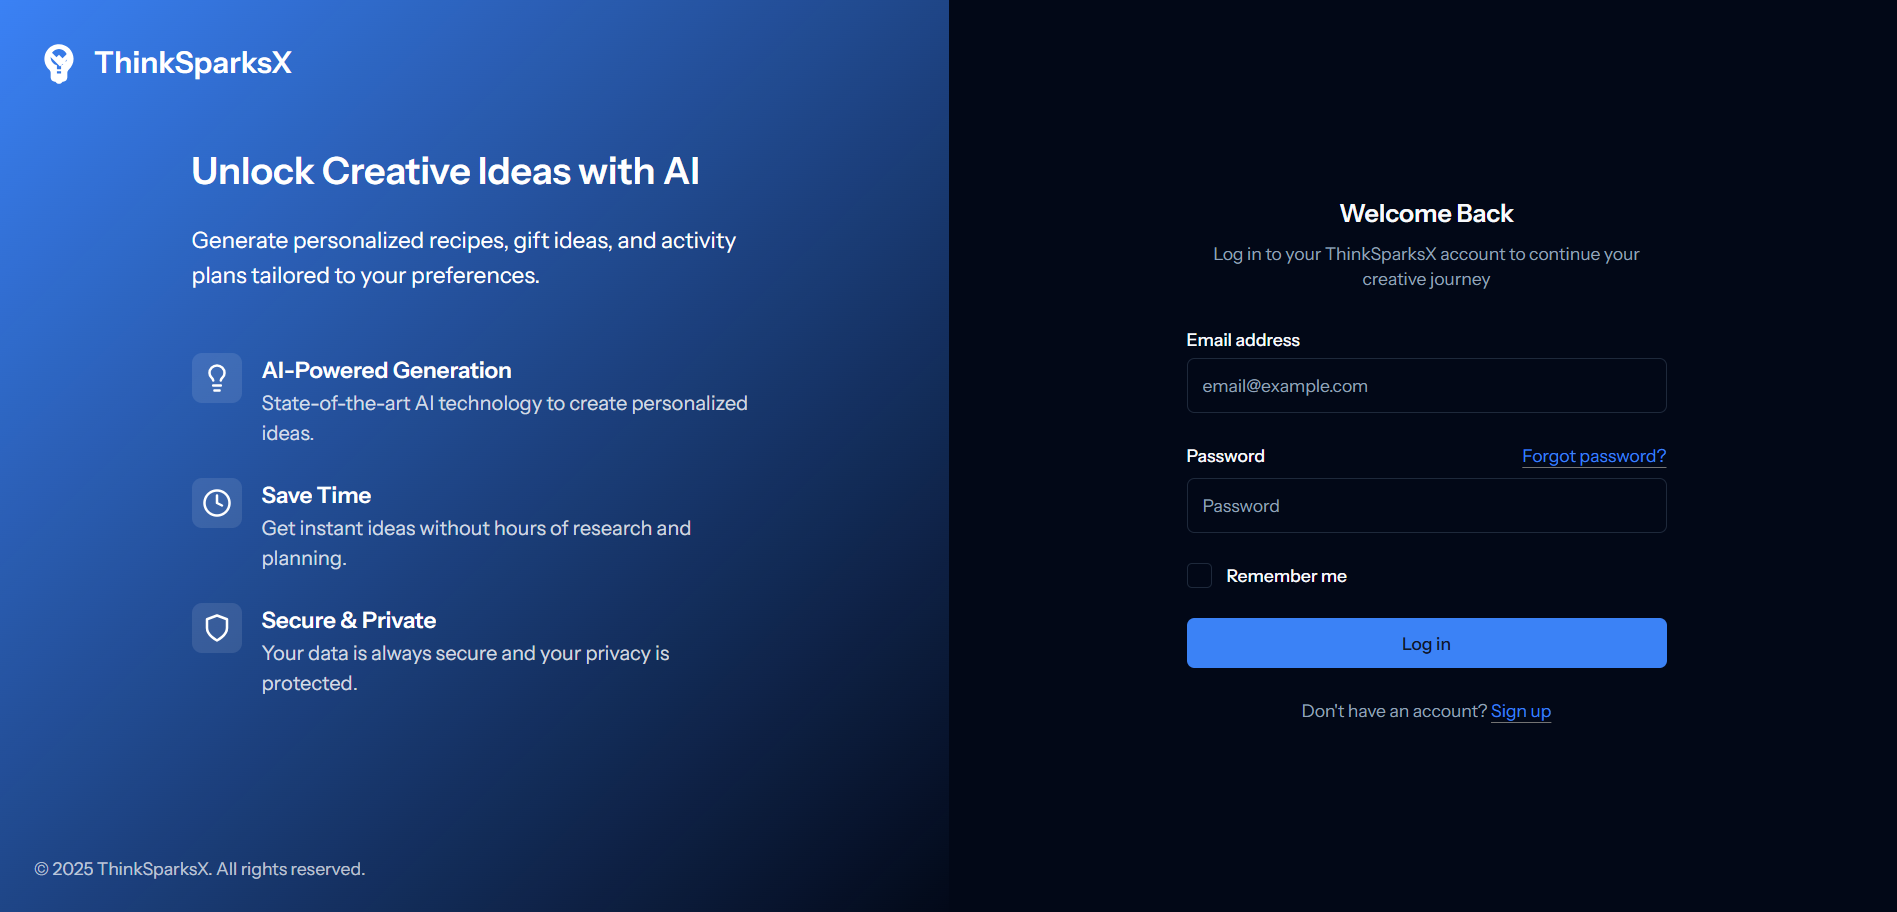
Module: User Authentication
Secure login system with modern authentication features and user session management.
- Email and password authentication
- Remember me functionality
- Password reset via email
- Secure session management
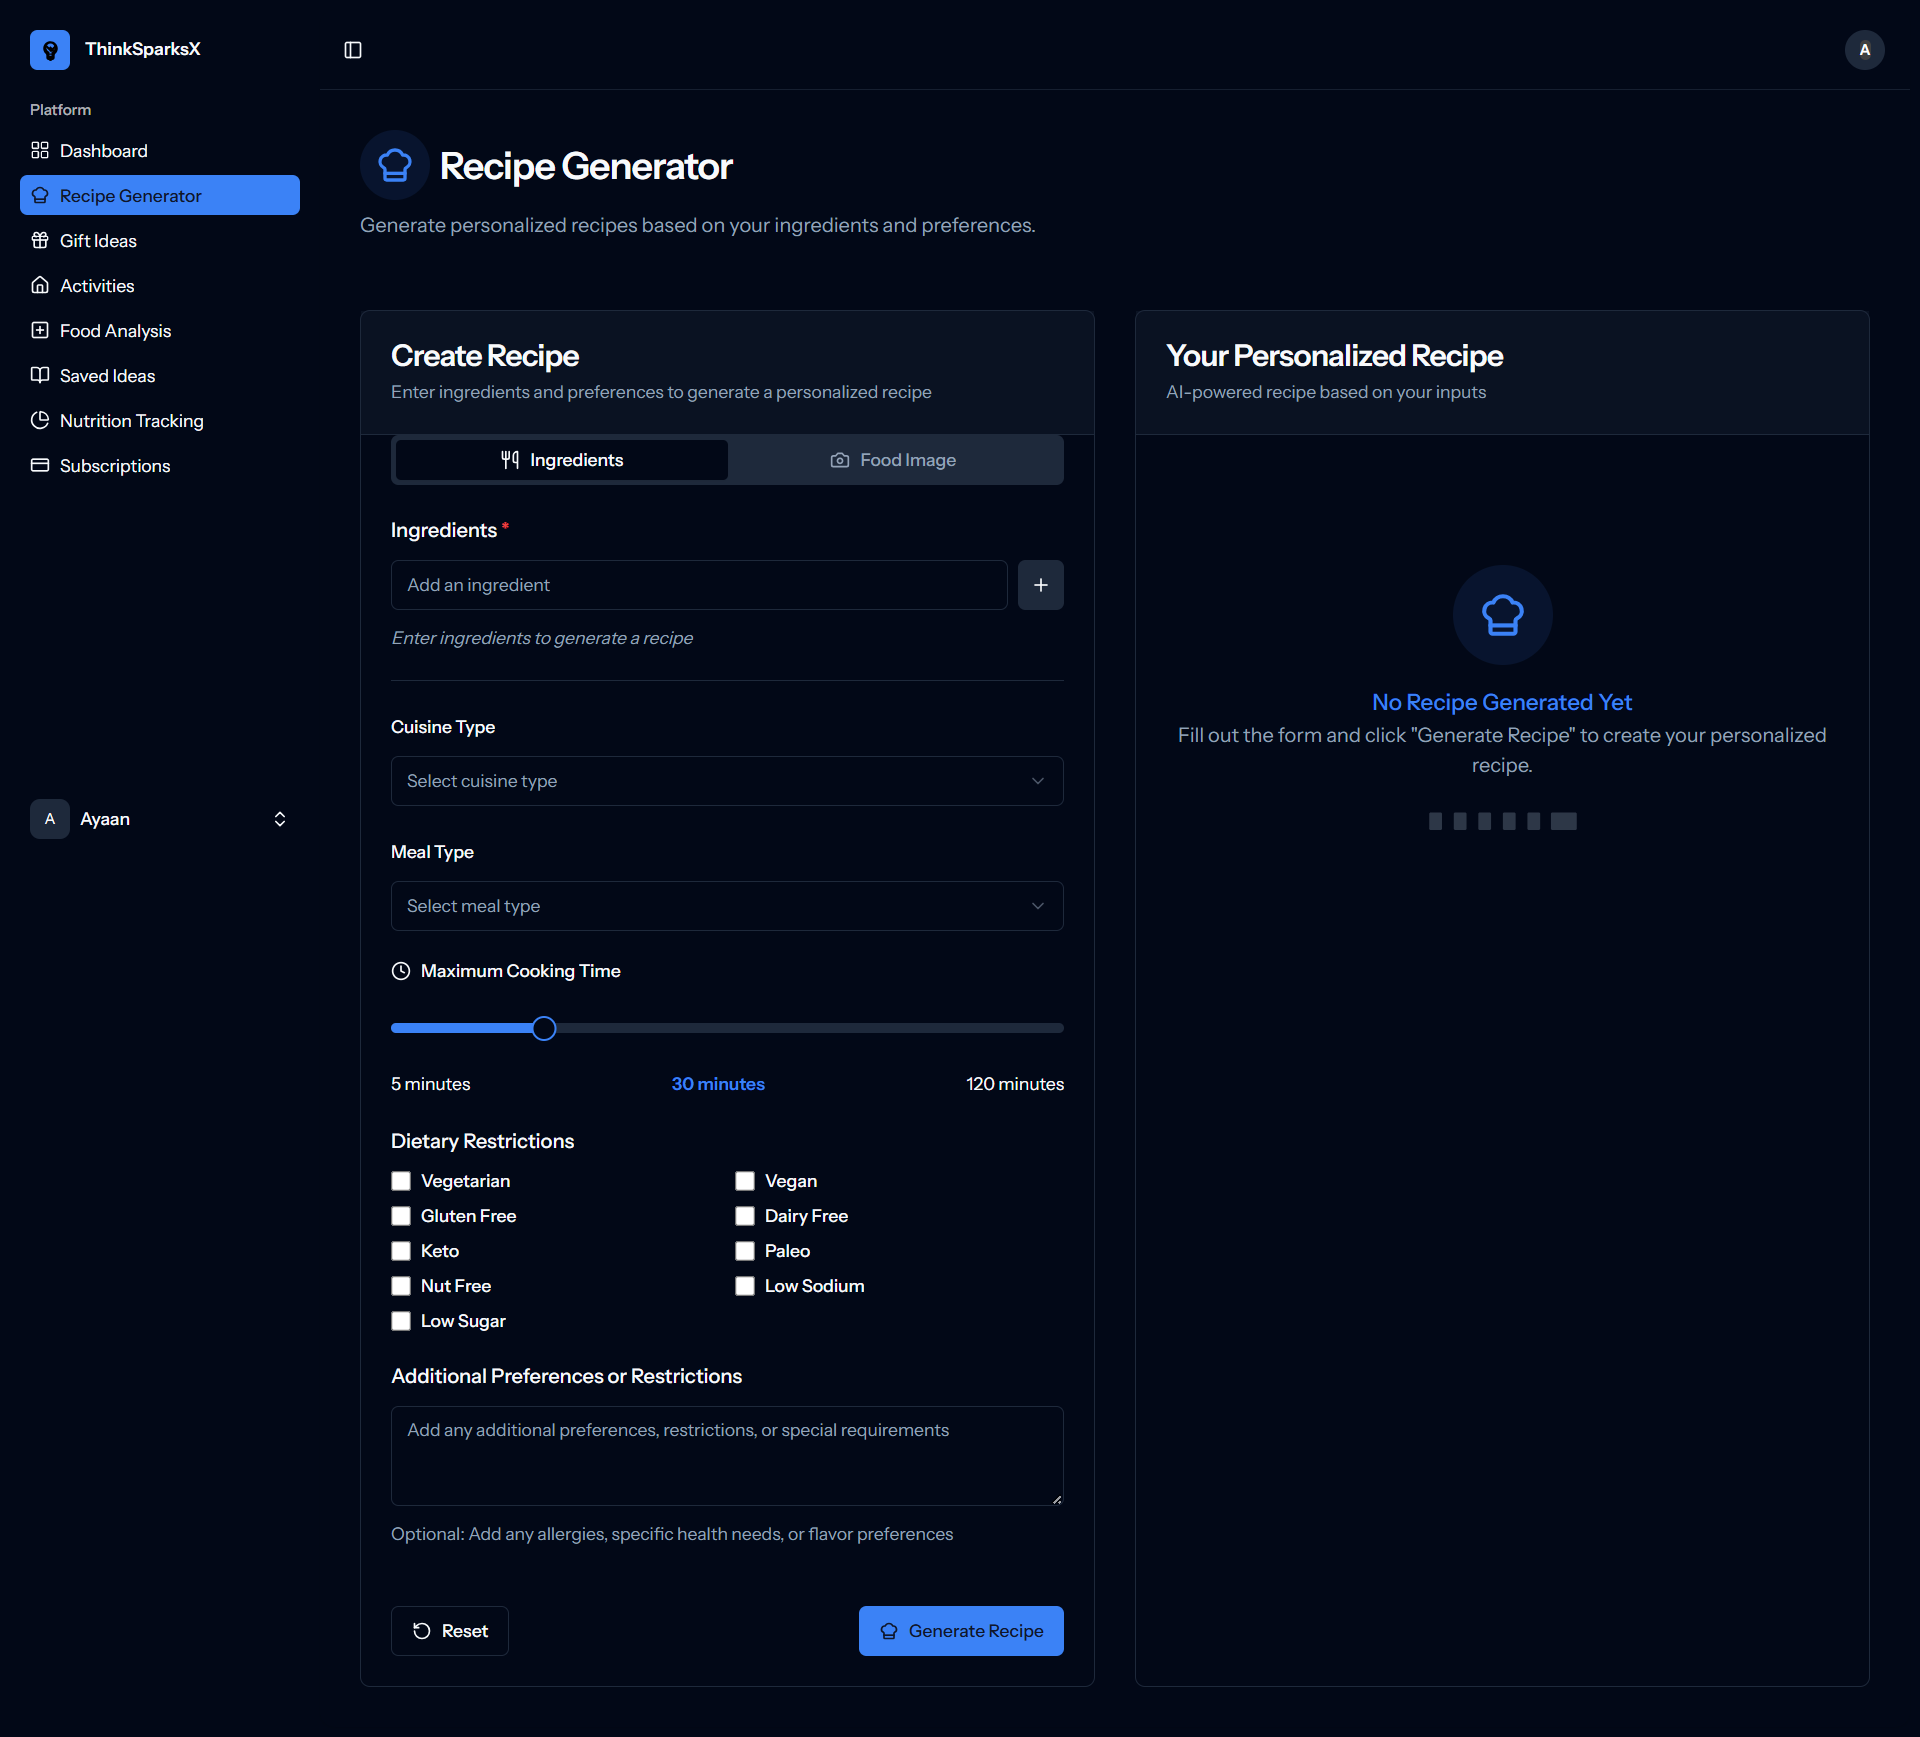
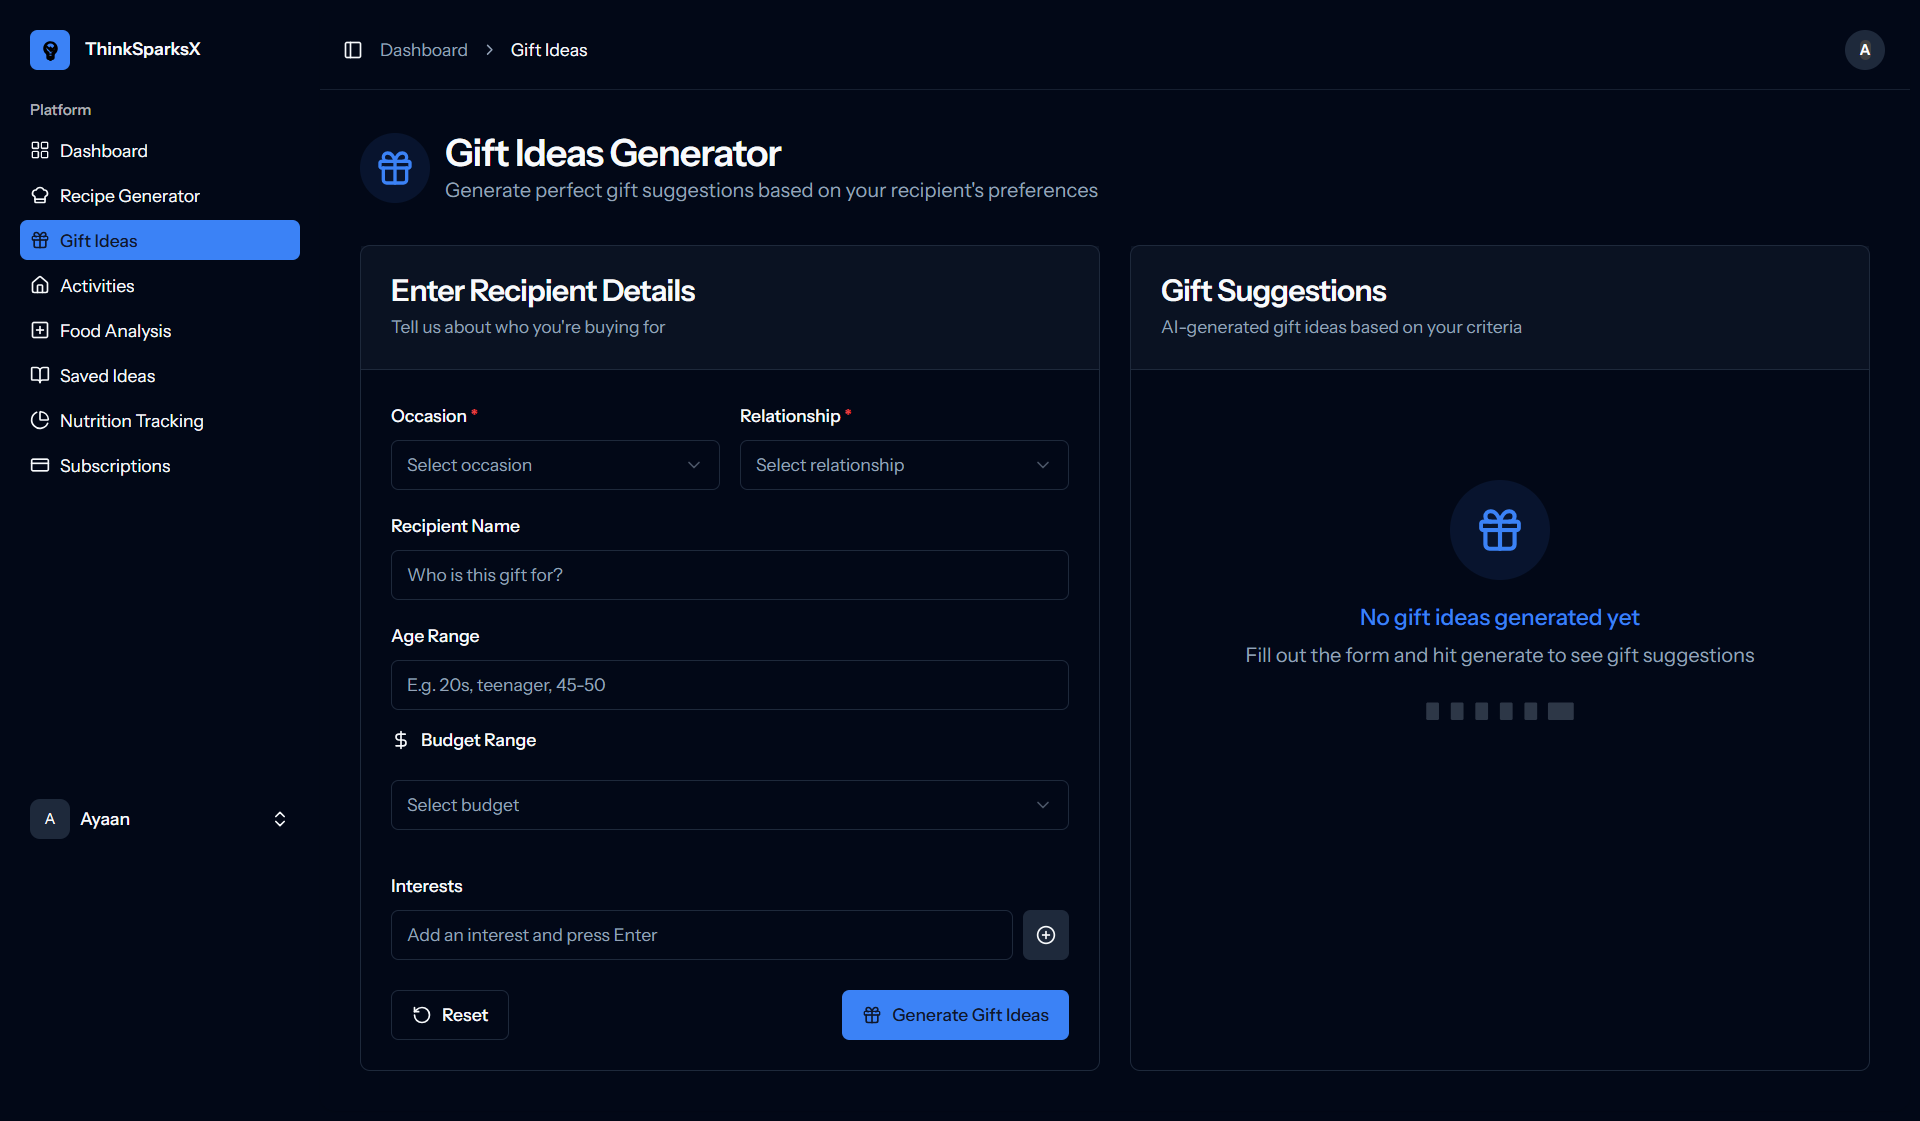
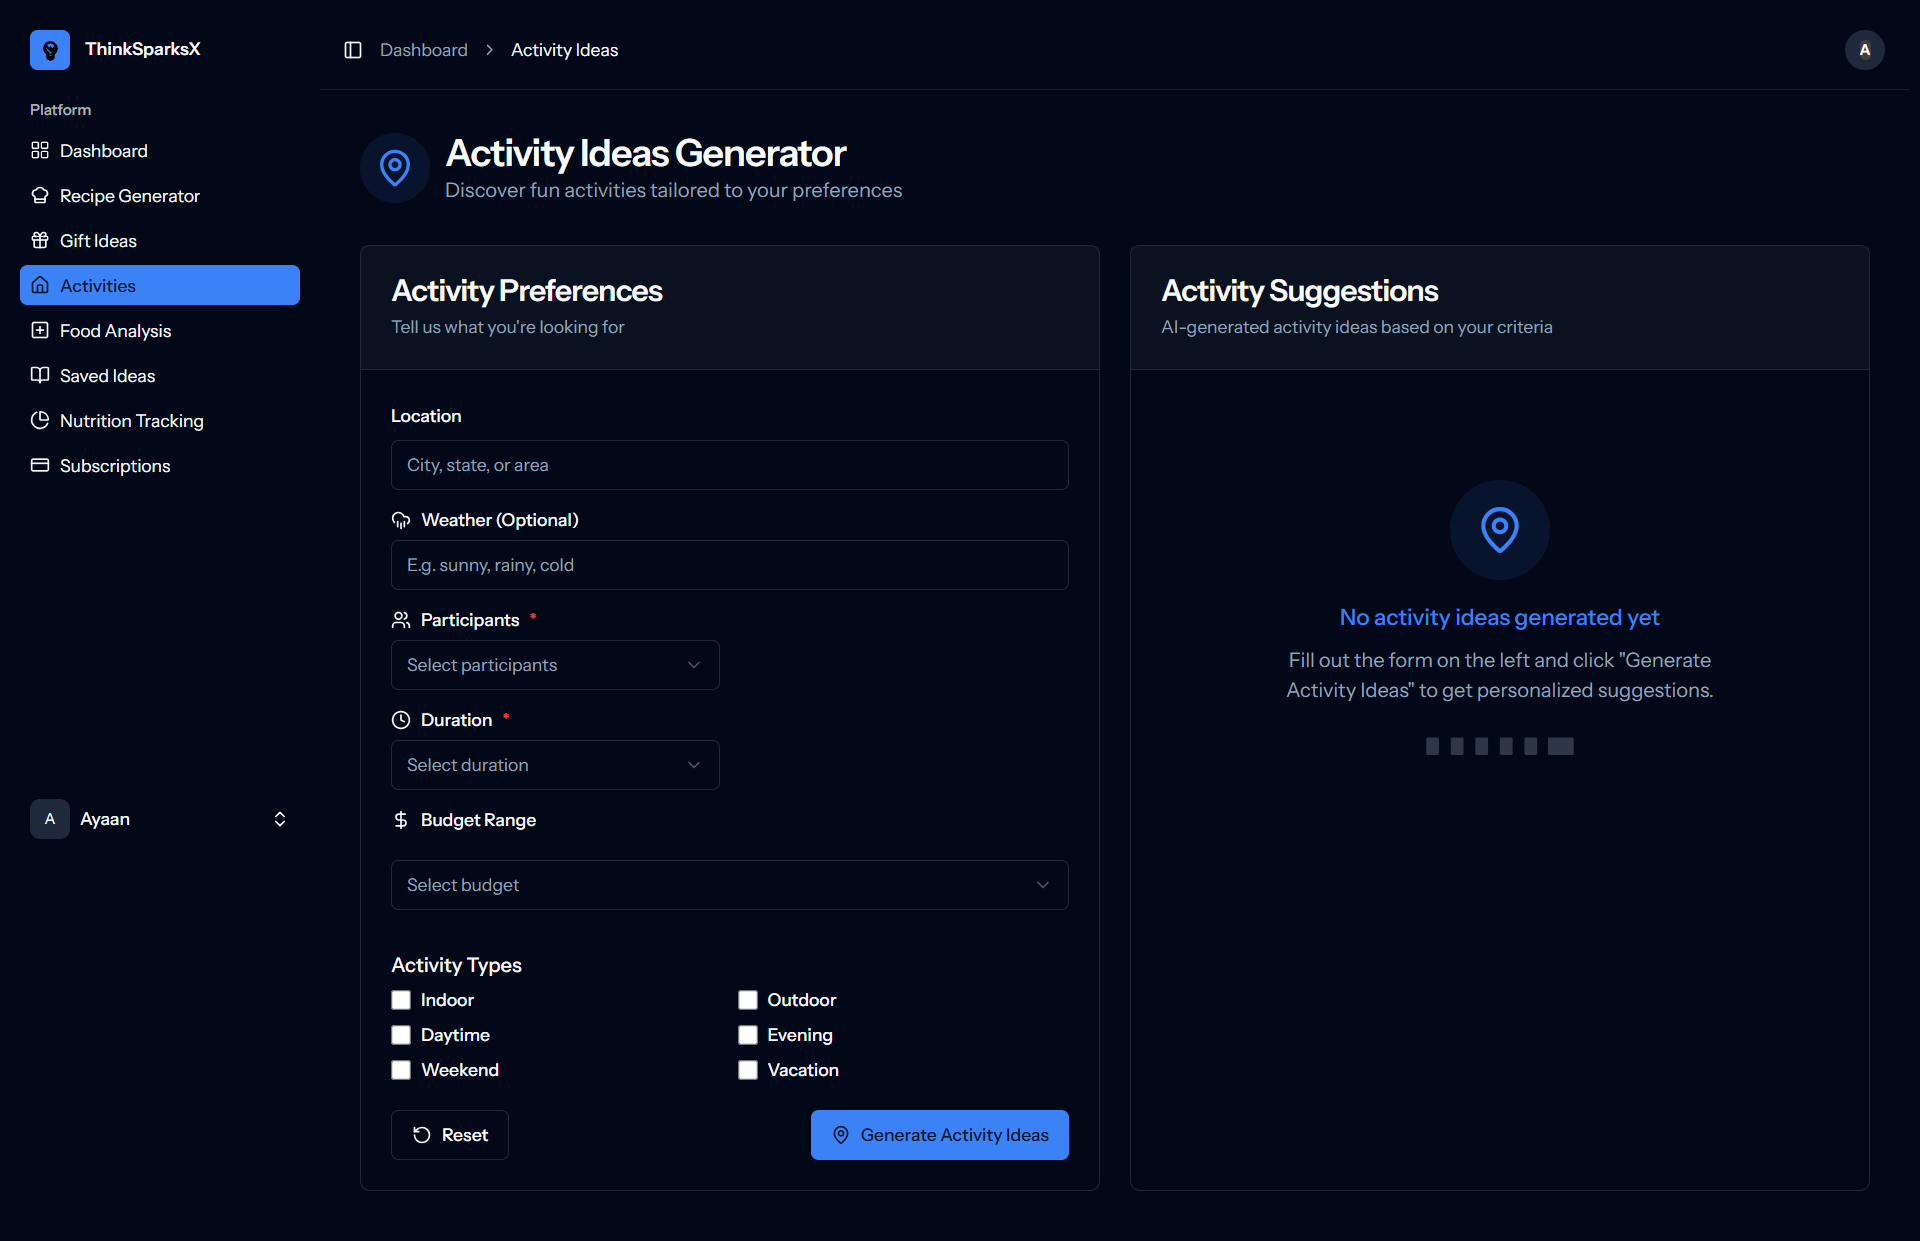
Module: Idea Generation
Generate personalized content in three categories: Recipes, Gifts, Activities.
- Open the Idea Generator.
- Select category: Recipe, Gift, or Activity.
- Fill inputs (ingredients/diet; recipient/occasion; location/budget).
- Choose AI provider (optional).
- Click Generate; Save, Favorite, or Copy results.
Free plans have limits; upgrade to increase generation caps.
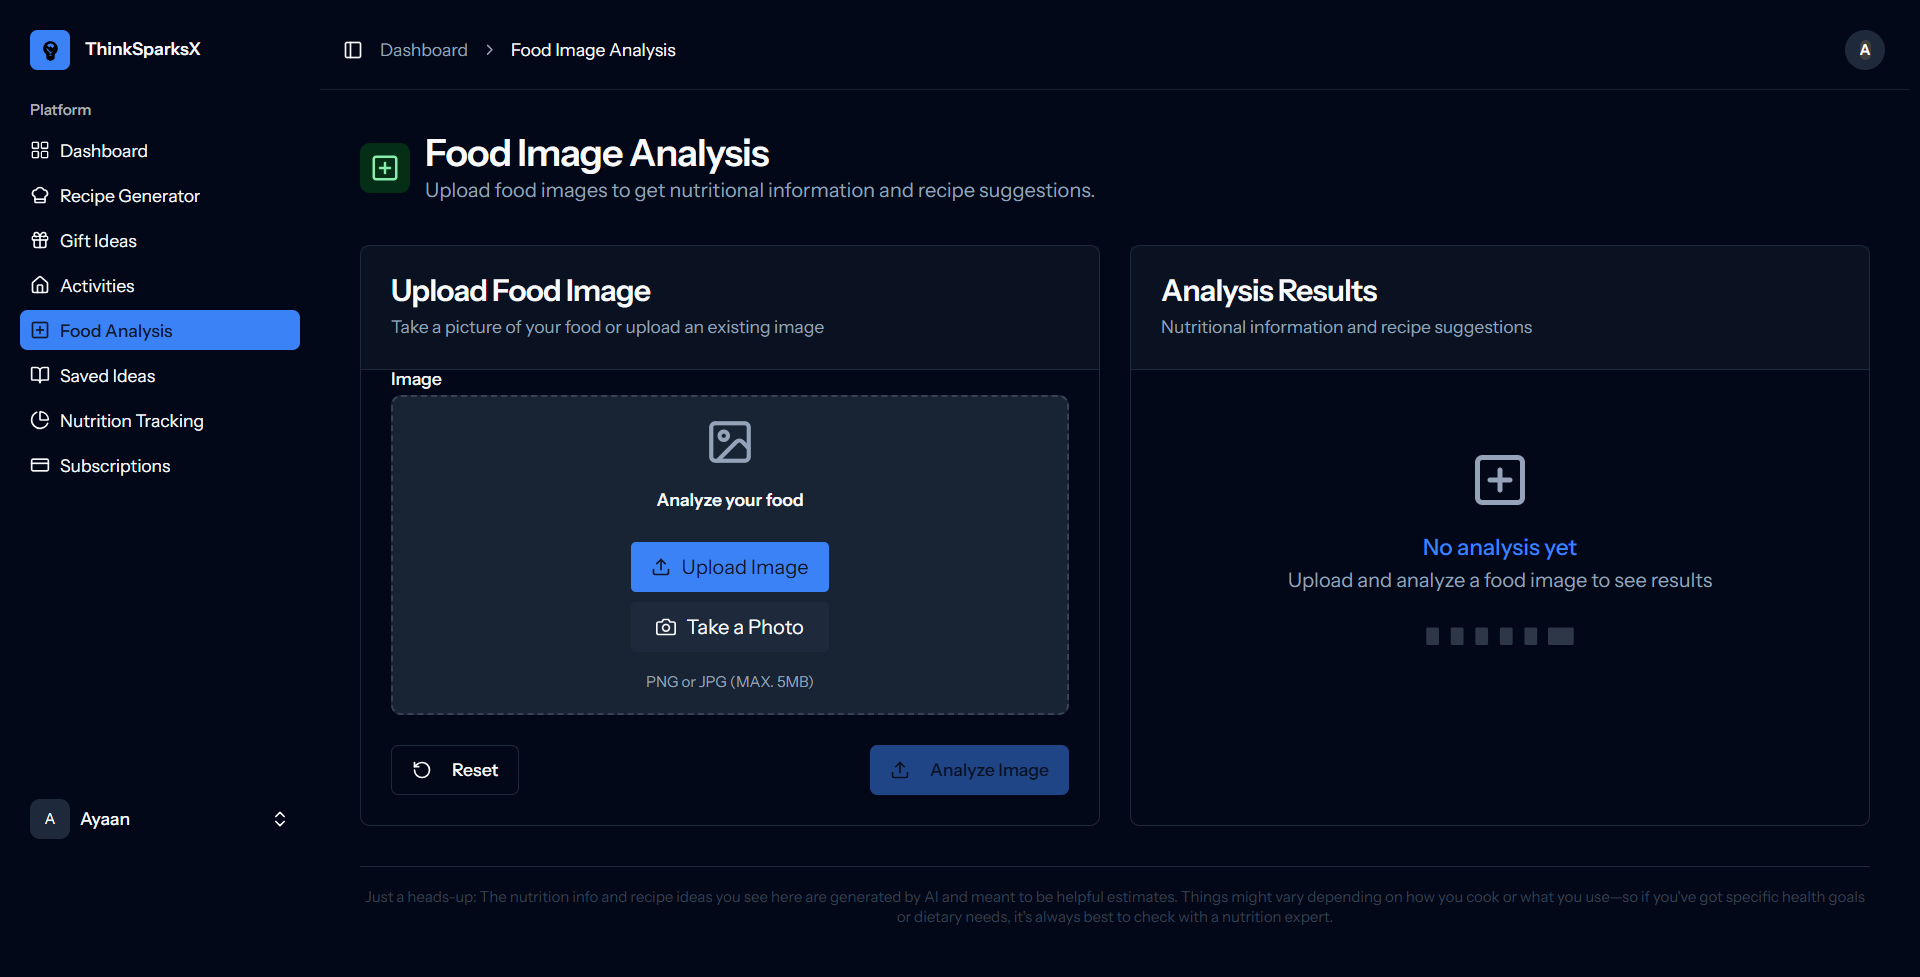
Module: Image Analysis
Upload a food photo to get nutrition estimates and recipe suggestions.
- Open Image Analysis.
- Upload a supported image (JPG/PNG/WebP).
- Submit and review insights; optionally save.
Module: Nutrition Tracking
Track calories and macros daily, view history, and convert recipes to shopping lists.
- Add daily entries
- See progress vs goals
- Review trends
Module: Saved Ideas
Organize saved recipes, gifts, and activities. Edit titles/notes, favorite, or delete.
- View all saved ideas in one place
- Edit titles and add personal notes
- Organize by category and favorites
- Quick access to regenerate or modify

Module: Shopping List
Aggregate ingredients from recipes, check off items while shopping, and print or clear checked.
- Convert recipes to shopping lists
- Check off items while shopping
- Organize by category
- Clear completed items
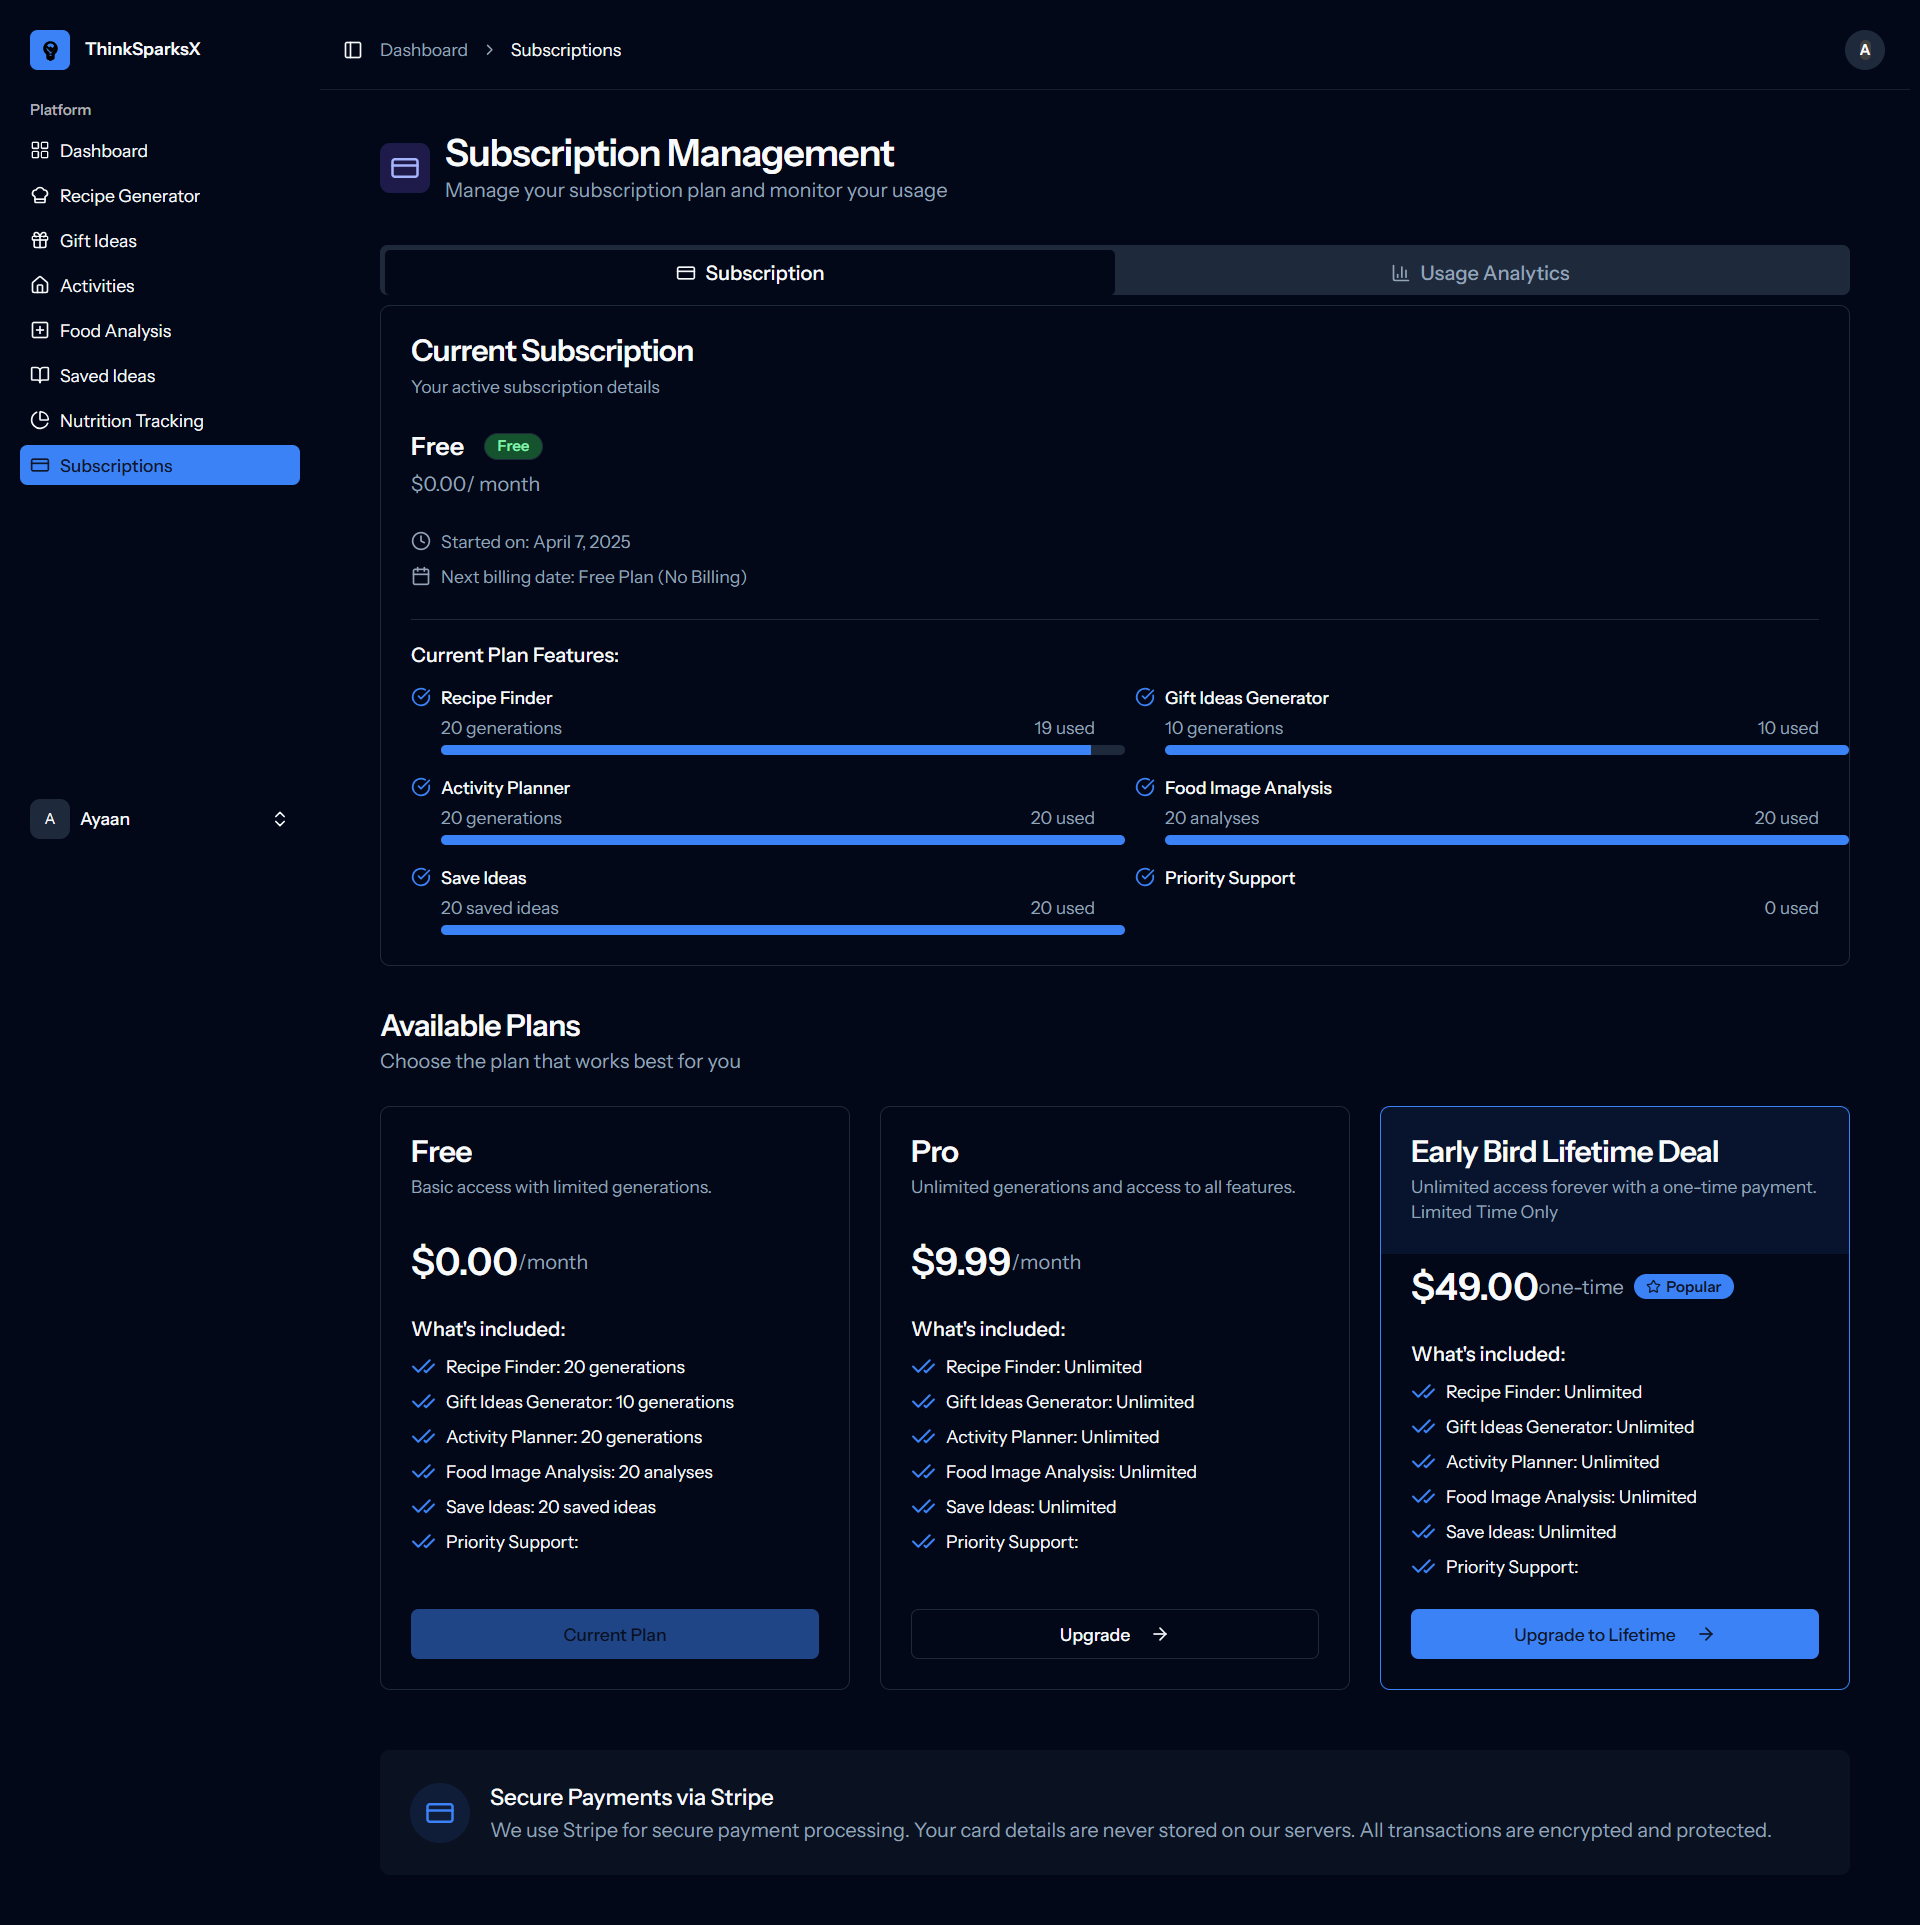
Module: Subscriptions & Billing
SaaS‑ready plans with Stripe. Users can upgrade from a free plan to paid tiers. Webhooks synchronize status and usage limits.
- Pricing page with plans
- Stripe checkout flow (test/live)
- Automatic plan status updates
Module: Settings & AI
Configure default AI provider and API keys. Admin‑only settings are not exposed in public demo environments.
- Provider: OpenAI, Gemini, DeepSeek
- Timeouts & tokens
- Mock mode for demos
Customization Guide
Transform ThinkSparksX to match your brand identity and business needs. This guide focuses on visual customization, branding, and user experience tweaks that don't require deep technical knowledge.
🎨 Brand Identity & Visual Elements
Logo & Branding
- Main Logo: Replace
/public/icons/thinksparks-logo.svgwith your logo - Favicon: Update
/public/favicon.icoand all icon variants - App Name: Change
APP_NAMEin your.envfile - Brand Colors: Update primary colors in
tailwind.config.js
Keep your logo in SVG format for crisp display at all sizes.
Theme & Styling
- Color Scheme: Modify
resources/css/custom-theme.css - Typography: Update fonts in
tailwind.config.js - Spacing: Adjust margins and padding in component files
- Shadows: Customize box shadows and depth effects
Use Tailwind's color palette or define custom colors in the config.
🖼️ User Interface Customization
Landing Page
- Hero Section: Edit
resources/js/Pages/Home.vue - Feature Highlights: Update feature descriptions and images
- Call-to-Action: Customize buttons and messaging
- Social Proof: Add testimonials or client logos
Dashboard & Components
- Dashboard Layout: Modify
resources/js/Pages/Dashboard.vue - Navigation: Update sidebar and header in layout files
- Cards & Widgets: Customize dashboard component styling
- Icons: Replace Lucide icons with your preferred icon set
📧 Content & Messaging
- Email Templates: Personalize welcome emails, notifications, and receipts
- System Messages: Update success/error messages and notifications
- Form Labels: Customize field names and button text
- Help Text: Add your own guidance and tooltips
- Legal Pages: Update terms, privacy policy, and disclaimers
⚙️ Feature & Module Customization
Subscription Plans
- Plan Names: Update plan titles and descriptions
- Feature Lists: Modify what each plan includes
- Pricing Display: Customize how plans are shown to users
- Plan Limits: Adjust generation limits and feature access
Module Settings
- AI Providers: Choose default AI service and customize options
- Image Analysis: Enable/disable food image processing
- Nutrition Tracking: Customize health and nutrition features
- Social Features: Add sharing and community features
🎭 Advanced UI Customization
- Dark/Light Mode: Customize theme switching behavior
- Animations: Add custom CSS transitions and effects
- Responsive Design: Adjust mobile and tablet layouts
- Accessibility: Improve color contrast and screen reader support
📱 Mobile & Responsive Tweaks
- Mobile Navigation: Customize mobile menu and interactions
- Touch Targets: Ensure buttons are properly sized for mobile
- Mobile Forms: Optimize form layouts for small screens
- Progressive Web App: Customize PWA manifest and icons
• Start with logo and colors for quick brand impact
• Test customizations on different devices and browsers
• Keep a backup of original files before making changes
• Use browser dev tools to preview changes in real-time
🔧 File Locations Quick Reference
•
/public/icons/ → Logo and favicon files•
/resources/css/custom-theme.css → Custom styles•
/tailwind.config.js → Theme colors and fonts•
/resources/js/Pages/Home.vue → Landing page•
/resources/js/Pages/Dashboard.vue → Dashboard layout•
/resources/views/emails/ → Email templates•
/database/seeders/FeaturesAndPlansSeeder.php → Plans
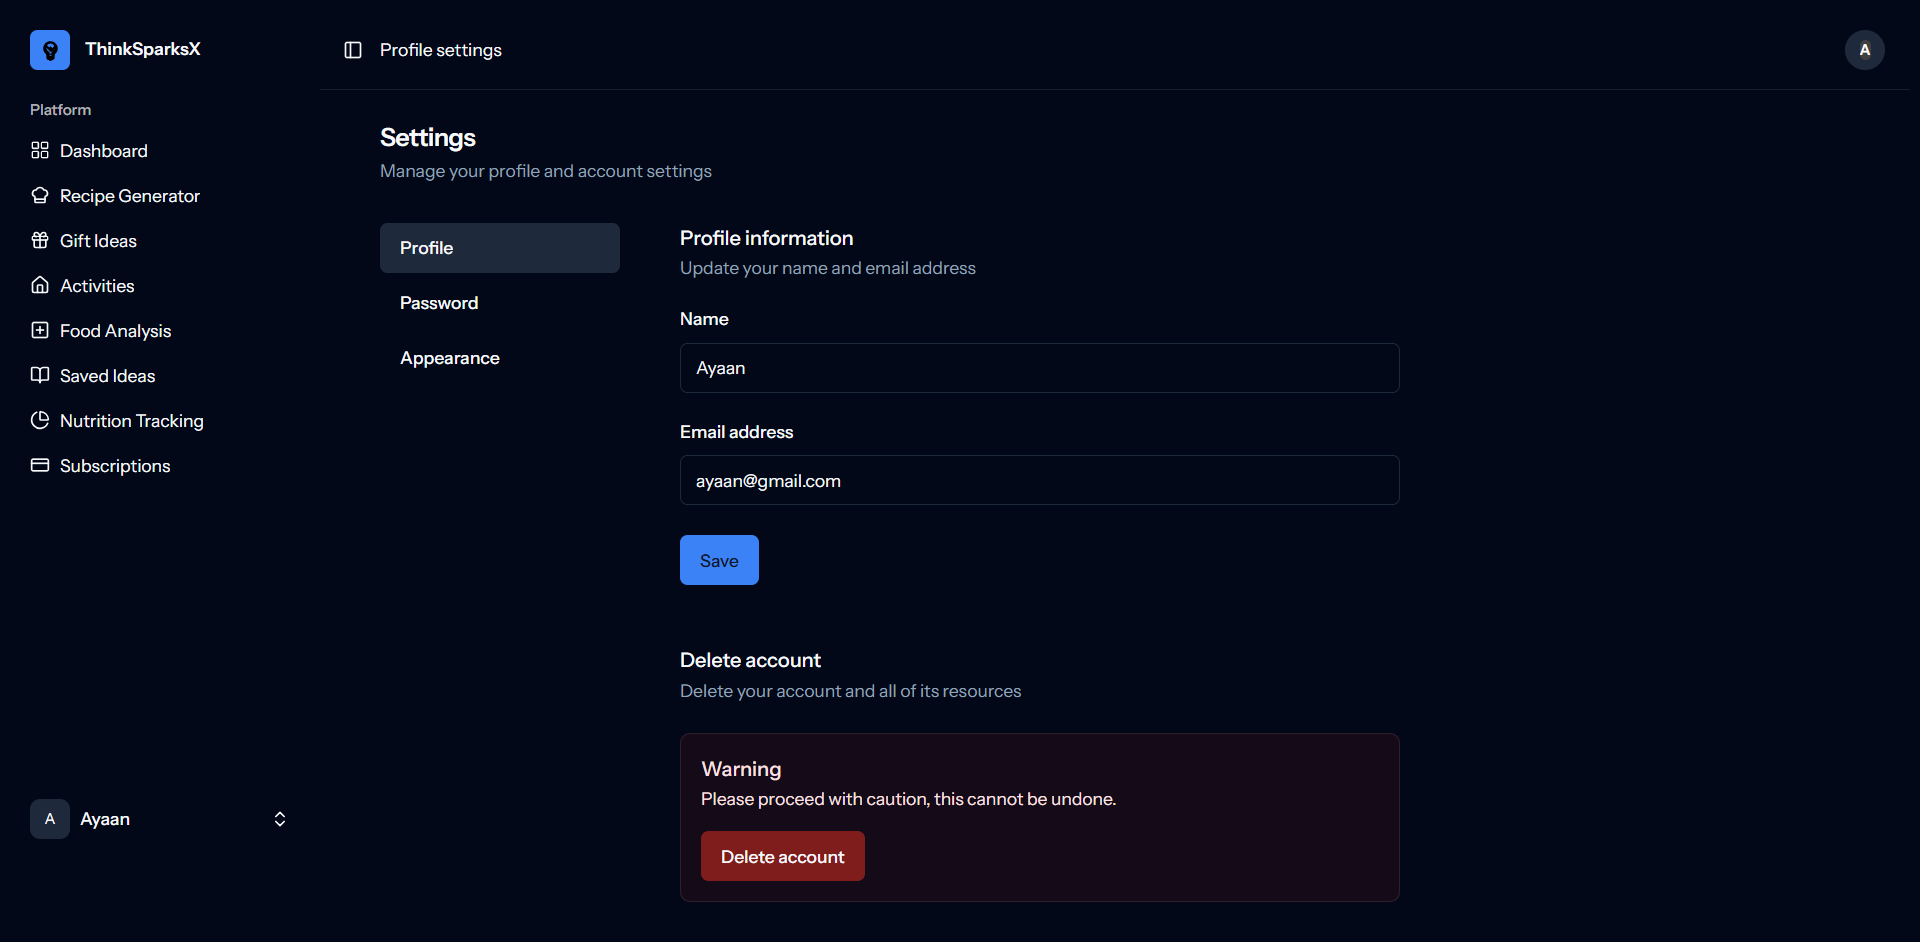
Account & Security
- Update profile and email
- Email verification
- Secure logout
Troubleshooting Common Issues
This section covers the most common problems you might encounter during installation and setup. Most issues can be resolved by following these simple steps.
🚨 Critical Errors & Solutions
Error: 500 Internal Server Error
What it means: The server encountered an error while processing your request.
Quick Fix:
- Check your
.envfile exists and has correct values - Run:
php artisan optimize:clear - Then run:
php artisan config:cache - Check file permissions:
chmod -R 755 storage bootstrap/cache
Error: Database Connection Failed
What it means: The application can't connect to your database.
Quick Fix:
- Verify database credentials in
.envfile - Ensure database exists and is accessible
- Check if database user has proper privileges
- Verify database host and port settings
Error: APP_KEY Missing
What it means: The application encryption key hasn't been generated.
Quick Fix:
- Run:
php artisan key:generate - Check that
.envfile contains the generated key - Clear cache:
php artisan config:clear
⚠️ Common Installation Issues
Assets Not Loading (CSS/JS Missing)
What it means: Your website looks broken with missing styles and functionality.
Quick Fix:
- Shared Hosting: Ensure web root points to
publicfolder - VPS: Run
npm run buildto compile assets - Check if
publicfolder contains CSS/JS files - Verify
storage:linkcommand was run
Migration Failed
What it means: Database tables couldn't be created.
Quick Fix:
- Check database user has CREATE privileges
- Verify database exists and is accessible
- Run:
php artisan migrate --force - Check error logs in
storage/logs/laravel.log
Permission Denied Errors
What it means: The web server can't write to required directories.
Quick Fix:
- Set correct ownership:
chown -R www-data:www-data /path/to/app - Set correct permissions:
chmod -R 755 storage bootstrap/cache - Replace
www-datawith your web server user if different
🔧 Configuration Issues
Stripe Payment Not Working
What it means: Users can't complete payments through Stripe.
Quick Fix:
- Verify Stripe keys in
.envfile - Check if you're using test vs live keys
- Verify webhook endpoint URL in Stripe dashboard
- Check webhook secret matches your
.env
AI Generation Failing
What it means: Users can't generate AI-powered content.
Quick Fix:
- Check AI provider API keys in
.env - Verify API key has sufficient credits/billing
- Check if AI service is experiencing downtime
- Review error logs for specific error messages
Email Not Sending
What it means: Users don't receive confirmation emails or notifications.
Quick Fix:
- Verify SMTP settings in
.envfile - Check if hosting provider allows SMTP connections
- Test with a simple email service like Gmail SMTP
- Check email logs in
storage/logs/laravel.log
📱 Performance Issues
Slow Page Loading
What it means: Your website takes too long to load.
Quick Fix:
- Enable OPcache in PHP configuration
- Use Redis for caching if available
- Optimize images and compress assets
- Check database query performance
Queue Jobs Not Processing
What it means: Background tasks like email sending aren't working.
Quick Fix:
- Shared Hosting: Set up cron jobs for queue processing
- VPS: Use Supervisor to manage queue workers
- Check queue logs in
storage/logs/ - Verify cron jobs are running:
crontab -l
🔍 How to Get Help
Check Error Logs
Most errors are logged in these locations:
- Laravel Logs:
storage/logs/laravel.log - Web Server Logs: Check your hosting provider's error logs
- PHP Error Log: Usually in your hosting control panel
Enable Debug Mode (Development Only)
For detailed error information during development:
- Set
APP_DEBUG=truein.env - Set
APP_ENV=localin.env - Refresh the page to see detailed error information
- Important: Never enable debug mode in production!
Common Error Messages Decoded
→ Run:
composer dump-autoloadError: "No application encryption key has been specified"
→ Run:
php artisan key:generateError: "SQLSTATE[HY000] [2002] Connection refused"
→ Check database host and port in
.envError: "The stream or file could not be opened"
→ Check storage directory permissions
• Your hosting provider and plan
• PHP version and extensions
• Exact error message
• Steps you've already tried
Frequently Asked Questions
Get quick answers to the most common questions about ThinkSparksX. This section covers everything from basic setup to advanced customization.
🤔 General Questions
Q: What is ThinkSparksX exactly?
A: ThinkSparksX is an AI-powered SaaS application that helps users generate personalized ideas for recipes, gifts, and activities. It also includes food image analysis, nutrition tracking, and subscription management - all ready to monetize.
Q: Can I use this for my own business?
A: Absolutely! ThinkSparksX is designed as a complete SaaS solution. You can customize the branding, set your own pricing plans, and start earning money from day one. Many users run this as their primary business.
Q: Is there a demo I can try?
A: Yes! You can register a free account to explore all the features. The free account has limited generations so you can test the system thoroughly and see how it works before making a purchase decision.
Q: How much can I earn with this?
A: Earnings depend on your pricing strategy and marketing. Typical SaaS applications in this space generate $2,000-$10,000+ monthly. ThinkSparksX includes everything you need to get started with subscription billing.
💻 Technical Questions
Q: What hosting do I need?
A: Any modern hosting provider works! Shared hosting (like Namecheap, HostGator) is perfect for beginners. VPS hosting (like DigitalOcean, Linode) gives you more control and better performance. We provide detailed setup guides for both.
Q: Do I need to know coding?
A: Not at all! The installation is fully automated with our step-by-step guide. For customization, basic HTML/CSS knowledge helps, but we provide detailed instructions for everything. Most users customize colors, logos, and text without any coding.
Q: Can I use a different database?
A: Yes! ThinkSparksX works with MySQL, PostgreSQL, and SQLite. Laravel handles the database differences automatically, so you can choose what works best for your hosting environment.
Q: What about mobile devices?
A: ThinkSparksX is fully responsive and works perfectly on all devices. It's also a Progressive Web App (PWA), so users can install it on their phones like a native app.
💰 Business & Monetization
Q: How do I set up payments?
A: ThinkSparksX integrates with Stripe for secure payments. You just need to create a Stripe account (free), add your API keys, and configure your subscription plans. We provide a complete Stripe setup guide.
Q: Can I customize the pricing plans?
A: Absolutely! You can create unlimited pricing tiers with different features and limits. The system includes a free plan and paid plans with higher generation limits, advanced features, and priority support.
Q: What about AI costs?
A: You'll need your own AI provider accounts (OpenAI, Google Gemini, or DeepSeek). Costs are typically $0.01-$0.10 per generation. You can set your own pricing to cover these costs and make a profit.
Q: Can I white-label this for clients?
A: Yes! Many users customize ThinkSparksX for their clients' businesses. You can change all branding, colors, and text to match any business identity. Perfect for agencies and consultants.
🎨 Customization & Branding
Q: How easy is it to change the logo?
A: Very easy! Just replace the logo file in the public folder. We provide exact file locations and step-by-step instructions. You can also customize colors, fonts, and the entire look and feel through our customization guide.
Q: Can I change the app name?
A: Yes! You can change "ThinkSparksX" to any name you want. This includes the browser title, email templates, and all system messages. Perfect for creating your own brand identity.
Q: What about email templates?
A: All email templates are fully customizable. You can change the wording, add your logo, and match your brand colors. This includes welcome emails, payment confirmations, and password reset emails.
Q: Can I add new features?
A: Yes! ThinkSparksX is built on Laravel, one of the most popular PHP frameworks. You can add new modules, modify existing features, or integrate with other services. We provide development documentation for advanced users.
🚀 Getting Started
Q: How long does installation take?
A: About 10-15 minutes for most users. The process is fully automated with our step-by-step guide. Even beginners can have it running in under 20 minutes.
Q: What if I get stuck during installation?
A: We provide comprehensive troubleshooting guides and 6 months of free support. Most issues can be resolved by following our step-by-step solutions. If you still need help, our support team responds within 1-2 business days.
Q: Can I test it locally first?
A: Absolutely! You can install ThinkSparksX on your local computer using XAMPP, WAMP, or similar tools. This is great for testing and customization before going live.
Q: What's the best hosting for beginners?
A: We recommend shared hosting with cPanel (like Namecheap or HostGator) for beginners. It's affordable, includes everything you need, and our installation guide is specifically designed for cPanel users.
🔒 Security & Privacy
Q: Is my data secure?
A: Yes! ThinkSparksX follows Laravel security best practices. User passwords are encrypted, API keys are stored securely, and the system includes protection against common web attacks. We also provide security configuration guides.
Q: What about GDPR compliance?
A: ThinkSparksX includes features for GDPR compliance, including user data export, deletion requests, and privacy policy templates. However, you should review and customize these for your specific business needs.
Q: Can I backup my data?
A: Yes! We provide automated backup solutions and manual backup instructions. You can backup your database, user uploads, and configuration files. Regular backups are essential for any business application.
Changelog
Version 1.0.0 – Initial release. See release-notes.txt for update steps.
Support
We aim to respond within 1–2 business days for installation, configuration, and bug fixes.
Contact: contact@solvenceai.com
Please include: server environment, steps to reproduce, error messages/logs, and your application version.
Support Policy
We provide comprehensive support to help you get ThinkSparksX running successfully. Here's what's included and what's not.
✅ What's Included (6 Months Free Support)
Installation & Setup
- Server environment verification
- Database configuration assistance
- Environment file setup guidance
- Permission and file structure issues
- Composer and NPM dependency issues
Configuration & Integration
- Stripe payment gateway setup
- AI provider API key configuration
- Email service configuration
- Web server configuration (Nginx/Apache)
- Cron job and queue setup
✅ Bug Fixes & Clarifications
- Bug Reports: Investigation and fixes for application bugs
- Feature Clarification: Explanation of how features work
- Documentation Updates: Clarifying unclear documentation
- Compatibility Issues: Server environment compatibility problems
❌ What's Not Included
Custom Development
- Custom feature development
- Third-party integrations
- Custom themes or designs
- Database schema modifications
- API endpoint customization
Infrastructure & Hosting
- Server setup and configuration
- Hosting provider issues
- Domain and SSL setup
- Server performance optimization
- Backup and security setup
❌ External Service Issues
- Stripe: Payment processing, account setup, or billing issues
- AI Providers: OpenAI, Gemini, or DeepSeek API issues or billing
- Email Services: SMTP configuration or delivery issues
- Hosting Providers: Server downtime or hosting-specific problems
Support Channels & Response Times
- Email Support: contact@solvenceai.com - 1-2 business days
- Documentation: This comprehensive guide covers most common issues
- Community: Check our marketplace for community support
Before Contacting Support
• Server environment (PHP version, OS, hosting provider)
• Detailed steps to reproduce the issue
• Error messages and logs from
storage/logs/• Your application version and any customizations
• Screenshots or screen recordings if applicable
Extended Support Options
For ongoing support beyond 6 months or custom development needs, we offer:
- Extended Support Plans: Monthly/yearly support subscriptions
- Custom Development: Feature development and customization
- Consulting: Architecture review and optimization
- Training: Team training and best practices
Contact us for pricing and availability of extended support options.
Credits & Licenses
ThinkSparksX is built using open-source technologies and integrates with various third-party services. Here's a complete breakdown of licenses and attributions.
Open Source Technologies (MIT License)
Backend Framework
- Laravel 12: laravel.com - MIT License
- PHP 8.2+: php.net - PHP License
- MySQL/PostgreSQL: Open source database systems
Frontend Technologies
- Vue.js 3: vuejs.org - MIT License
- Inertia.js: inertiajs.com - MIT License
- Tailwind CSS: tailwindcss.com - MIT License
UI Components & Icons
- Shadcn/ui: ui.shadcn.com - MIT License
- Lucide Icons: lucide.dev - MIT License
- Radix UI: radix-ui.com - MIT License
Third-Party Services & APIs
Payment Processing
- Stripe: stripe.com - Payment gateway service
- Note: Users must have their own Stripe account and API keys
AI & Machine Learning
- OpenAI: openai.com - GPT models API
- Google Gemini: ai.google.dev - AI models API
- DeepSeek: platform.deepseek.com - AI models API
- Note: Users must provide their own API keys and are responsible for usage costs
Development Tools & Dependencies
- Composer: PHP dependency manager - MIT License
- Node.js & NPM: JavaScript runtime and package manager
- Vite: Build tool - MIT License
- TypeScript: JavaScript superset - Apache 2.0 License
Image & Media Sources
- Demo Images: Generated using AI or sourced from royalty-free stock photo services
- Icons: Lucide Icons (MIT License) and custom SVG icons
- Fonts: Inter font family (Open Font License)
License Compliance
Commercial Usage
- ThinkSparksX Application: Commercial license - See purchase terms
- Open Source Components: Can be used commercially under their respective licenses
- Third-Party Services: Subject to their respective terms of service
- Custom Modifications: Your modifications remain your intellectual property
Attribution Requirements
When using ThinkSparksX, you must maintain attribution to:
- Original open-source projects (Laravel, Vue.js, Tailwind CSS)
- Third-party services (Stripe, OpenAI, etc.)
- UI component libraries (Shadcn/ui, Radix UI)
For complete license texts and detailed attribution requirements, check the respective project websites and license files included in the source code.